
Learn how to install chandelier crystals step by step, from tools and safety prep to verification and upkeep, for brilliant, long-lasting lighting results.
TL;DR:
- Proper tools, safety precautions, and preparation ensure successful chandelier crystal installation.
- Consistent checking, cleaning, and maintenance prolong the chandelier’s brilliance and longevity.
- Quality crystals and attention to detail significantly enhance the fixture’s visual impact over time.
A chandelier without its crystals is like a stage without lights. You have the fixture, the frame, and the bulbs, but the room still feels flat. Properly installed crystals catch light and scatter it across your walls and ceiling in ways that no other decorative element can match. Whether you’re restoring a vintage piece or upgrading a modern fixture, the installation process is more approachable than most people expect. This guide walks you through every stage, from gathering your tools to verifying your final results, so you can enjoy that brilliant, light-filled room you’ve been imagining.
Key Takeaways
| Point | Details |
|---|---|
| Preparation is critical | Having the right tools and crystals ensures installation goes smoothly and safely. |
| Step-by-step accuracy | Following clear instructions prevents mistakes and achieves dazzling lighting results. |
| Ongoing maintenance | Regular cleaning and inspection maximize your chandelier’s brilliance and longevity. |
| Expert advice matters | Professional tips and guidance can elevate your chandelier’s appearance beyond DIY basics. |
What you need before installing chandelier crystals
Preparation is everything. Rushing into installation without the right tools or materials is the fastest way to end up with broken crystals, uneven placement, or worse, a safety hazard. A solid installation checklist is your first line of defense against costly mistakes.
Tools and materials you’ll need:
- Cotton or lint-free gloves (to prevent fingerprints on crystal surfaces)
- A sturdy, non-slip ladder tall enough to reach the fixture comfortably
- Replacement crystals matched to your chandelier’s style and size
- Crystal-safe cleaning solution and soft microfiber cloths
- Small pliers for opening and closing metal pins or jump rings
- A soft towel or foam mat placed below the chandelier to catch any drops
- Masking tape and a marker for labeling crystal positions if needed
Before you touch the fixture, turn off the power at the circuit breaker. Not just the wall switch. The breaker. This eliminates any risk of electrical contact while you’re working at height with wet hands or cleaning solution nearby.
Safety note: Never work on a chandelier while the power is on, even if the lights appear off. Always verify the circuit is dead using a non-contact voltage tester before touching any wiring or metal parts.
Once the power is off, lay your soft mat below the fixture and set up your ladder. Organize your crystals by size and type before climbing. This saves you from making repeated trips up and down.
Not all crystals attach the same way. Here’s a quick comparison to help you pick the right type for your fixture:
| Crystal type | Attachment method | Best for |
|---|---|---|
| Faceted prisms | Metal pin or eye pin | Traditional and vintage chandeliers |
| Teardrop pendants | Jump ring and hook | Modern and transitional fixtures |
| Stranded beads | Wire or string | Cascading or waterfall-style designs |
| Flat octagons | Direct clip or pin | Grid-pattern and formal chandeliers |
For replacement crystals advice, always match the hole diameter and pin gauge of your existing crystals to avoid loose fittings or incompatible hardware.
Step-by-step instructions for installing chandelier crystals
With all tools and preparation complete, you’re ready to begin the step-by-step process of installing chandelier crystals for maximum effect. Detailed steps can ensure a flawless outcome, so follow each one carefully.
- Remove old or damaged crystals first. Use your pliers to gently open the pin or jump ring at the top of each crystal. Set removed pieces aside in a labeled container so you can reference their original positions later.
- Clean the chandelier frame. Before adding new crystals, wipe down the arms and frame with a damp microfiber cloth. Dust and grime on the frame will dull your new crystals’ appearance almost immediately.
- Sort your new crystals by size and position. Lay them out on your foam mat in the order they’ll be installed. This step alone saves significant time once you’re up the ladder.
- Attach crystals from the top down. Start with the highest mounting points and work downward. This prevents finished lower sections from being disturbed as you reach past them.
- Secure each fastener fully. Use pliers to close every pin or jump ring completely. A partially open ring is the number one cause of crystals falling after installation.
- Step back and check symmetry as you go. After every row or tier, climb down and view the chandelier from across the room. Catching asymmetry early is far easier than correcting it at the end.
Here’s a quick reference for the three most common attachment methods:
| Attachment type | Tool needed | Difficulty level |
|---|---|---|
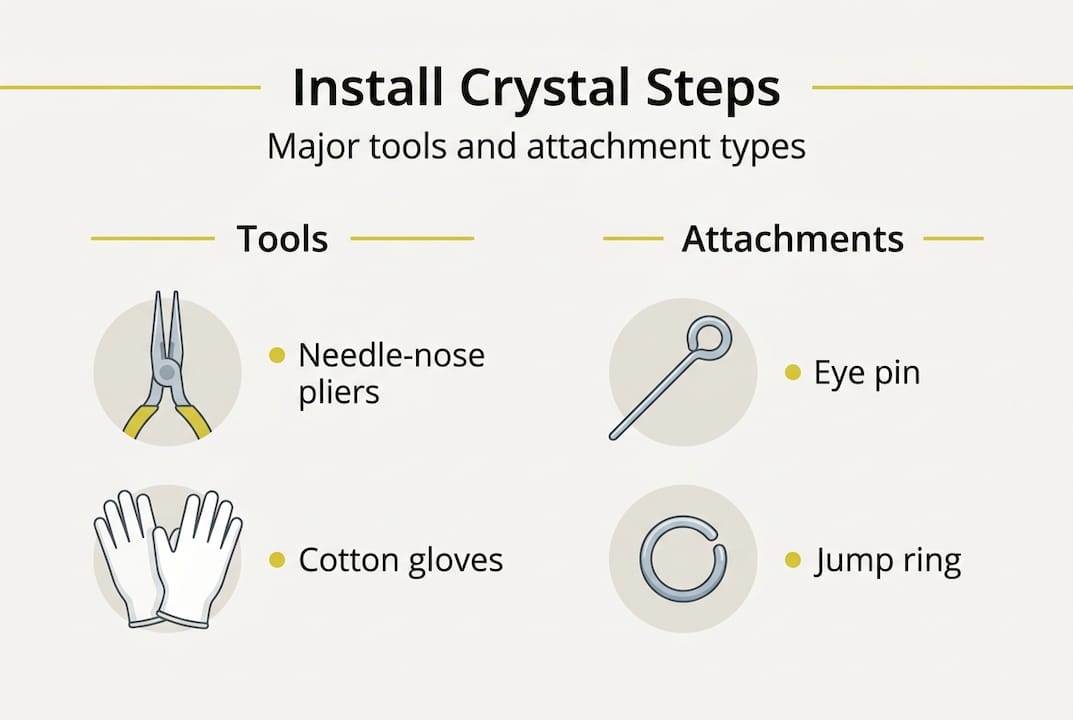
| Eye pin | Needle-nose pliers | Beginner |
| Jump ring | Two pairs of pliers | Intermediate |
| String or wire | Scissors and crimp beads | Intermediate |
Compatible crystals make the process significantly easier because the hardware aligns without forcing or bending.
Pro Tip: Always wear your cotton gloves when handling new crystals. The natural oils from your fingertips leave permanent smudges on crystal surfaces that are nearly impossible to remove without disassembly.
For more guidance on choosing replacement crystals that match your fixture’s existing style, compare hole size, lead content, and surface cut before ordering.
Troubleshooting and avoiding common installation mistakes
Once you’ve completed the main installation steps, it’s vital to address potential problems and avoid pitfalls that could undermine your efforts. Mistakes can jeopardize both the fixture and the final appearance, so take these warnings seriously.
Common problems and their causes:
- Uneven placement: Usually caused by skipping the symmetry check between rows. Fix by removing and repositioning affected crystals before the installation is complete.
- Loose crystals: Almost always the result of incompletely closed jump rings or pins. Go back with pliers and close every fastener fully.
- Wrong crystal type used: A crystal that’s too heavy for its mounting point will eventually pull the pin loose. Always verify weight limits for each position on your fixture.
- Visible fingerprints: Caused by handling crystals without gloves. Clean with a crystal-safe solution and a lint-free cloth, then re-glove before continuing.
- Mismatched sizes in a single row: Often happens when replacement crystals are ordered without measuring the originals. Always measure diameter and length before ordering.
Warning: If you notice any frayed wiring, loose sockets, or burn marks while working on your chandelier, stop immediately and consult a licensed electrician before proceeding. Crystal installation should never involve contact with electrical components.
For avoiding guesswork with replacements, photograph your chandelier before removing any crystals. That single photo will save you hours of confusion when it’s time to reassemble.

Pro Tip: Use a small piece of masking tape on each arm of the chandelier to mark the correct number and size of crystals per position. This turns a confusing puzzle into a simple fill-in-the-blanks task.
For visual inspiration on what a correctly installed chandelier should look like, browsing chandelier crystal examples can help you set a clear target before you begin.
How to verify your chandelier crystals are installed correctly
Once troubleshooting is complete, it’s time to confirm that your work delivers the dazzling results you envisioned. Proper installation verifies the fixture’s brilliance and longevity, so don’t skip this final review.
Inspection steps:
- Restore power and observe from a distance. Turn the lights on and stand at the far end of the room. Look for dark spots, unlit areas, or sections that seem visually heavy compared to others.
- Check each crystal for movement. Gently touch each pendant. It should swing freely but return to a straight hanging position. Any crystal that spins sideways or hangs at an angle has a fastener issue.
- Look for symmetry across the entire fixture. Walk around the chandelier slowly. Each arm should mirror the others in crystal count, size, and placement.
- Inspect for cleanliness. Even one smudged crystal can dull an entire section. Use your cleaning checklist to address any fingerprints or dust before calling the job done.
- Test the light scatter. Dim the room and observe where light is being projected on the walls and ceiling. A well-installed crystal chandelier should throw rainbow-like prisms across multiple surfaces.
Quick upkeep tips to maintain your results:
- Dust crystals monthly with a soft, dry cloth to prevent buildup
- Deep clean every 6 to 12 months using a crystal-safe solution
- Inspect fasteners annually and tighten any that have loosened over time
- Replace any cracked or chipped crystals promptly to maintain visual consistency
A well-maintained chandelier can boost room brightness by up to 30%, which is a significant return on a relatively small investment of time and care. Following a regular maintenance checklist keeps your fixture performing at its best year after year.
What most guides miss about chandelier crystal installation
Most installation articles stop at “attach the crystal and close the ring.” That’s fine for a quick fix, but it misses the bigger picture entirely. The real difference between a chandelier that looks stunning for a decade and one that looks tired within a year comes down to two things: crystal quality and consistent upkeep.
Cheap acrylic crystals, even when installed perfectly, lose their clarity within months. They yellow under heat, scratch easily, and scatter light poorly compared to genuine lead crystal or [buying the right crystal prisms](https://www.crystalplace.com/blogs/news/clear-crystal prisms for chandeliers buy right). The upfront savings rarely justify the replacement costs or the visual disappointment.
Attention to detail separates a professional-looking result from an amateur one. That means checking fastener alignment, matching cut styles across the entire fixture, and cleaning before and after installation. Most DIY guides skip these details entirely.
Long-term chandelier maintenance is just as important as the installation itself, yet it’s almost always treated as an afterthought. We’ve seen beautifully installed chandeliers lose half their brilliance within two years simply because the owner never cleaned them. Treat your chandelier like the centerpiece it is, and it will reward you with decades of stunning light.
Enhance your chandelier with CrystalPlace solutions
You now have everything you need to install, verify, and maintain your chandelier crystals with confidence. The next step is sourcing crystals that are actually worth installing.

At Crystal Place, we’ve been supplying authentic Swarovski and premium crystal products since 1991. Our crystal prisms collection includes everything from replacement pendants to full chandelier kits, with free shipping on orders over $22 within the USA. If you want to add a touch of magic beyond the chandelier itself, our rainbow maker suncatcher is a beautiful complement to any light-filled room. Browse our collection or reach out to our team for personalized guidance on matching crystals to your specific fixture.
Frequently asked questions
How do I choose replacement chandelier crystals?
Match the crystal size, shape, and attachment type to your existing chandelier, and use compatibility guidelines from your retailer for the best results.
Can I install crystals on any chandelier?
Most chandeliers accommodate crystal additions, but always check for proper mounting points and weight limits before you begin; detailed guidance is available in installation instructions for specific fixture types.
What’s the safest way to clean chandelier crystals after installation?
Turn off power, apply a mild cleaning solution with a soft cloth, and avoid touching crystals with bare hands to prevent smudges; your maintenance checklist covers every step in detail.
Should I hire a professional for chandelier crystal installation?
DIY installation works well for most homeowners, but high ceilings or complex fixtures may call for a professional; authentic crystal guidance can help you assess whether your fixture is a good candidate for a DIY approach.
Recommended
- How to Install Chandelier Crystals for Stunning Results – CrystalPlace
- Crystal Chandelier Repair 2026: 95% Satisfaction Guide – CrystalPlace
- Replace Chandelier Crystals Without Guesswork – CrystalPlace
- 7 Steps to a Complete Crystal Chandelier Checklist – CrystalPlace