
Follow this comprehensive guide to cleaning crystal chandeliers and restore brilliance effectively. Learn actionable steps for sparkling results in your home.
Beautiful crystal chandeliers can transform a room, but keeping them spotless presents a real challenge. Protecting your investment starts with creating a safe workspace, gathering delicate cleaning tools, and using gentle cleaning solutions specifically designed for fragile surfaces. By following thoughtful preparation steps and using the right approach, you can maintain your chandelier’s brilliance and showcase its elegance throughout your American home.
Table of Contents
- Step 1: Prepare The Chandelier And Surrounding Area
- Step 2: Gather And Ready Cleaning Tools And Solutions
- Step 3: Remove Dust And Debris From Crystals And Frame
- Step 4: Clean Crystal Pieces With Appropriate Solutions
- Step 5: Inspect And Reassemble Chandelier For Safety
Quick Summary
| Essential Insight | Explanation |
|---|---|
| 1. Prepare your workspace properly | Clear the area under the chandelier and cover the floor with drop cloths to prevent damage during cleaning. |
| 2. Use gentle, specialized cleaning products | Select pH-neutral, non-abrasive cleaners and test them on inconspicuous areas to avoid damage. |
| 3. Handle crystals with care | Support each crystal while cleaning, and use gloves to avoid fingerprints and smudges. |
| 4. Inspect wiring and components during reassembly | Check for frayed wires and ensure all connections are secure before putting the chandelier back together. |
| 5. Work methodically and patiently | Take your time to avoid accidents, as rushing can lead to broken crystals or improper assembly. |
Step 1: Prepare the chandelier and surrounding area
Successfully cleaning a crystal chandelier requires careful preparation of both the fixture and its surrounding environment. Your goal is to create a safe, organized workspace that minimizes potential damage and maximizes cleaning efficiency.
Begin by gathering critical protective materials: drop cloths, plastic sheeting, painter’s tape, and soft towels. Clearing workspace safely involves creating a protected zone underneath and around your chandelier. Spread drop cloths or plastic sheeting across the entire floor area directly beneath the fixture to catch any potential crystal or cleaning solution drips. Use painter’s tape to secure these protective coverings and prevent slipping.
Next, prepare your immediate working area by taking these key steps:
- Turn off power to the chandelier at the circuit breaker
- Remove any delicate furniture or decorative items nearby
- Position a sturdy ladder that allows safe, comfortable access
- Have soft towels ready to place on ladder steps to prevent scratching surfaces
Ensure you have adequate lighting and ventilation in the room, which will help you see intricate crystal details and provide a comfortable working environment. Work during daylight hours if possible, or use bright, directed task lighting to illuminate the chandelier’s complex structure.
Pro tip: Always work methodically and slowly, keeping your workspace organized and minimizing unnecessary movement to reduce the risk of accidentally dislodging delicate crystal elements.
Step 2: Gather and ready cleaning tools and solutions
Preparing the right cleaning tools and solutions is crucial for safely maintaining your crystal chandelier’s delicate beauty. Your objective is to assemble a precise collection of gentle, effective cleaning materials that will restore your fixture’s sparkling brilliance without causing damage.
Selecting specialized cleaning products requires careful consideration. You’ll need soft, lint-free microfiber cloths, distilled water, a mild dish soap specifically recommended for delicate surfaces, white cotton gloves, and soft-bristled brushes designed for intricate cleaning.
Your essential cleaning toolkit should include:
- Distilled water (prevents mineral deposits)
- Mild, non-abrasive dish soap
- Soft microfiber cloths
- White cotton gloves
- Soft-bristled brushes with varied sizes
- Spray bottle for controlled solution application
- Small, clean lint-free towels
Prepare your cleaning solution by mixing a tiny amount of gentle dish soap with distilled water. Always dilute cleaning products and test the solution on a small, inconspicuous crystal area first to ensure it doesn’t cause discoloration or damage.
Safety is paramount when cleaning delicate crystal chandeliers. Use products specifically designed for fragile surfaces.
Pro tip: Wear white cotton gloves while handling crystal pieces to prevent leaving fingerprints and protect the delicate surface from skin oils.
Step 3: Remove dust and debris from crystals and frame
Removing dust and debris from your crystal chandelier is a delicate process that requires precision and gentle handling. Your objective is to eliminate accumulated dirt without risking damage to the intricate crystal components or the chandelier’s metal frame.
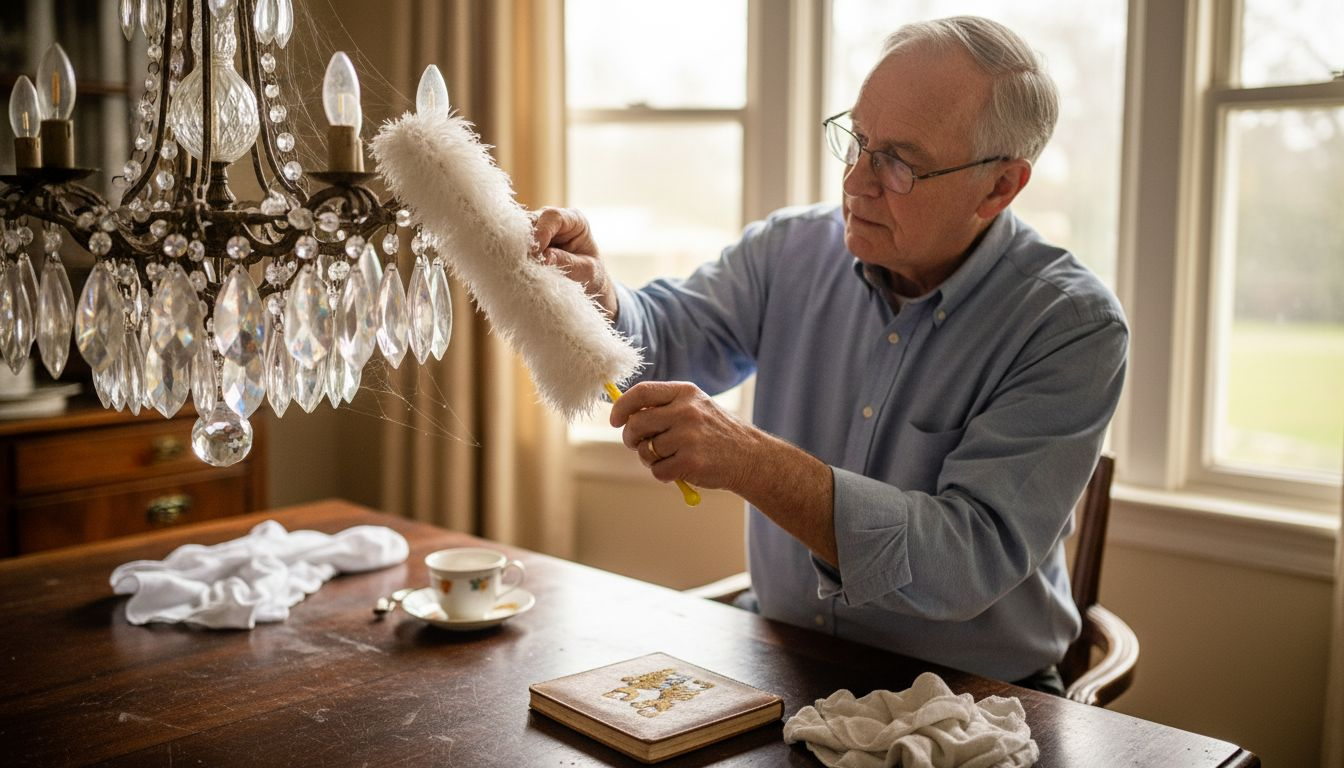
Cleaning delicate surfaces systematically begins with careful dust removal. Start by using a soft, clean feather duster or microfiber cloth to gently sweep away loose particles. Hold the duster or cloth at a slight angle to prevent direct contact with the crystals, using light, sweeping motions that follow the natural hanging pattern of the crystal pieces.
Your dust removal technique should include:
- Work from top to bottom of the chandelier
- Use soft-bristled brushes for hard-to-reach areas
- Move slowly and deliberately to avoid knocking crystals
- Use a clean, dry microfiber cloth for initial dust pass
- Support nearby crystals with your other hand while cleaning
For the metal frame, use a slightly damp microfiber cloth with a minimal amount of mild soap solution. Avoid saturating the frame and immediately dry the surface with a clean, soft cloth to prevent water spots or potential rusting.
Gentle, consistent motion is key when removing dust from delicate crystal chandeliers. Take your time and maintain a light touch.
Pro tip: Use a small handheld vacuum with a soft brush attachment on its lowest setting if you need additional dust removal, keeping the nozzle at least two inches away from crystal surfaces.
Step 4: Clean crystal pieces with appropriate solutions
Cleaning crystal chandelier pieces requires a delicate touch and precise technique to restore their original brilliance without causing damage. Your goal is to remove grime and buildup while preserving the crystal’s pristine clarity and structural integrity.
Selecting crystal cleaning solutions demands careful consideration of pH-neutral, non-abrasive products specifically designed for delicate glass surfaces. Create a gentle cleaning solution by mixing a small amount of mild dish soap with distilled water, ensuring the mixture is extremely diluted to prevent potential crystal damage.
Your crystal cleaning process should follow these critical steps:
- Prepare a clean, soft microfiber cloth
- Dampen cloth with diluted cleaning solution (not soaking wet)
- Gently wipe each crystal piece in a consistent, linear motion
- Support the crystal with your other hand to prevent swinging
- Use cotton swabs for intricate or hard-to-reach areas
- Immediately dry each crystal with a separate clean, dry microfiber cloth
Always work methodically, cleaning crystal pieces individually and supporting their weight to prevent accidental dropping or damage. Test your cleaning solution on an inconspicuous crystal first to ensure no discoloration or cloudiness occurs.
Patience and gentle handling are essential when cleaning delicate crystal chandelier pieces. Rush nothing.
Pro tip: Wear white cotton gloves during the entire cleaning process to prevent fingerprints and protect the crystal surfaces from natural skin oils.
Step 5: Inspect and reassemble chandelier for safety
Reassembling your crystal chandelier is a critical process that demands meticulous attention to detail and safety. Your primary objective is to ensure each component is correctly positioned and the electrical system remains fully functional and secure.
Electrical safety inspection requires careful examination of every wire, connection, and mounting point before reinstallation. Begin by laying out all cleaned crystal pieces in their original configuration, cross-referencing with any photographs or diagrams you created during disassembly.
Key safety reassembly steps include:
- Check electrical wiring for any signs of fraying or damage
- Ensure all wire connections are tight and secure
- Verify that mounting brackets are firmly attached
- Test electrical connections before full reinstallation
- Replace any compromised or worn components
- Confirm crystal pieces are correctly aligned and balanced
Systematically reattach crystal elements, starting from the top and working downward. Double-check each connection to guarantee structural integrity and prevent potential falling hazards.
Precision and patience are your best tools when reassembling a delicate crystal chandelier. Rush nothing.
Pro tip: Use a work surface covered with a soft, clean cloth to prevent scratching or damaging crystal components during the reassembly process.
Compare common chandelier cleaning mistakes with recommended best practices:
| Common Mistake | Negative Outcome | Best Practice Recommendation |
|---|---|---|
| Skipping workspace prep | Damaged floor or furniture | Always cover and clear surroundings |
| Using tap water | Mineral spots on crystals | Use distilled water only |
| Handling crystals bare-handed | Fingerprints and smudges | Wear white cotton gloves |
| Rushing the cleaning process | Broken or dislodged crystals | Work methodically and patiently |
Here’s a quick reference guide for selecting materials and tools for each cleaning stage:
| Stage | Recommended Materials | Purpose |
|---|---|---|
| Preparation | Drop cloths, painter’s tape | Protects floor and surfaces |
| Dust Removal | Microfiber cloth, soft brush | Gently lifts dust and debris |
| Crystal Cleaning | Distilled water, cotton gloves | Cleans crystals without streaks or marks |
| Frame Cleaning | Mild soap, soft towel | Removes grime while protecting finish |
| Reassembly | Screwdriver, soft workspace | Ensures safe, accurate component placement |
Elevate Your Crystal Chandelier Care with Expert Solutions
Cleaning a crystal chandelier demands patience and precision to protect its delicate components and restore its stunning brilliance. If you have faced challenges like avoiding fingerprints, selecting safe cleaning solutions, or preventing accidental damage, Crystal Place offers the perfect way to support your efforts. Our collection of authentic crystal prisms, chandelier crystals, and carefully curated cleaning products is designed to help you maintain the elegance and clarity your fixture deserves.

Discover how our specialized crystal cleaning solutions and replacement parts can simplify your maintenance routine and keep your chandelier sparkling beautifully. Visit Crystal Place now and explore our selection crafted for homeowners and decorators who are committed to excellence in crystal care. Don’t wait to protect your investment — make your cleaning process safer and more effective today by browsing our premium crystal products and accessories and ensure your chandelier shines flawlessly.
Explore more tips and products for flawless chandelier upkeep at Crystal Place.
Frequently Asked Questions
How do I prepare the area for cleaning a crystal chandelier?
To prepare the area for cleaning, start by turning off the power at the circuit breaker and clearing the space beneath the chandelier. Spread drop cloths or plastic sheeting on the floor to protect it from drips, and ensure you have a sturdy ladder and soft towels ready for safe access and to prevent scratches.
What cleaning solutions should I use for crystal chandeliers?
Use a gentle cleaning solution made from a small amount of mild dish soap mixed with distilled water. Always dilute the soap, test it on an inconspicuous area, and ensure you avoid using any abrasive products that could damage the crystals.
How do I safely remove dust from the chandelier’s crystals?
To remove dust, use a soft feather duster or microfiber cloth to gently sweep away loose particles, ensuring you work from top to bottom. Support each crystal with your other hand while cleaning, moving slowly to avoid knocking any pieces loose.
What steps are involved in cleaning individual crystal pieces?
Clean individual crystal pieces by dampening a soft microfiber cloth with your diluted cleaning solution and wiping each crystal in a linear motion. Always support the crystal with one hand to prevent it from swinging or falling, and dry each piece immediately with a separate clean cloth.
How do I reassemble my chandelier safely after cleaning?
During reassembly, ensure that all electrical connections are secure and check for frayed wiring. Systematically reattach the crystal components from the top down, verifying that each piece is balanced and properly aligned to prevent safety hazards.
What are common mistakes to avoid when cleaning a chandelier?
Common mistakes include skipping workspace preparation, using tap water rather than distilled, and handling crystals without gloves. To avoid these issues, always protect your surroundings, use only distilled water, and wear white cotton gloves to keep fingerprints off the crystals.
Recommended
- How to Clean a Crystal Chandelier - Brilliante Crystal Cleaner – CrystalPlace
- Clean a Crystal Chandelier Safely, No Stress – CrystalPlace
- Best Cleaner for Chandeliers: What Works – CrystalPlace
- Ultimate Chandelier Cleaning Guide: Tips & Tricks – CrystalPlace
- How to Clean Charging Ports for Optimal Device Performance – buy2fix