

Learn how to assemble crystal garlands with our step-by-step DIY guide. Enhance your home decor with stunning, customizable, sparkling designs.
TL;DR:
- Assembling crystal garlands involves stringing beads onto durable thread or wire to create decorative lighting accents and home décor. Proper material choice, planning, and secure connections ensure the garland’s longevity and visual appeal. Carefully hanging with a slight drape enhances its elegance and prevents damage over time.
Assembling crystal garlands is the process of stringing and connecting crystals and beads onto durable thread or wire to create decorative strands for lighting accents, chandeliers, and home decor. Done right, a crystal garland adds genuine sparkle to any space, from a living room mantle to a wedding reception centerpiece. The key to a garland that holds up over time is choosing the right materials before you start and following a clear sequence of steps. This guide walks you through every stage of the crystal garland assembly guide, from planning your layout to hanging the finished piece.
What materials and tools do you need to assemble crystal garlands?
The materials you choose determine how long your garland lasts and how good it looks. Get this part right, and the rest of the process becomes much easier.
Choosing the right crystals and beads
Crystal garlands work with glass crystals, genuine crystal beads, and even wooden or acrylic beads depending on the look you want. Genuine crystal beads, including Swarovski-style faceted strands, catch light better than acrylic and create a more polished result. For chandeliers and formal event decor, faceted glass or crystal beads are the standard choice. Wooden beads work well for rustic or holiday garlands where sparkle is less important than texture.
Selecting your stringing material
The stringing material carries the full weight of every bead, so it needs to match the job. Synthetic fibers like nylon outperform natural fibers because natural materials degrade under sustained weight over time. That degradation leads to snapped strands and scattered beads, which is exactly what you want to avoid. Clear fishing line or fine jewelry wire balances strength and near-invisibility, giving the finished garland a clean, polished look where the crystals appear to float. For lighter bead garlands, a strong nylon thread works well. For heavier crystal beads, 20-pound or 30-pound monofilament fishing line is the safer choice.
Tools you will need
| Tool | Purpose |
|---|---|
| Scissors or wire cutters | Cutting thread or wire to length |
| Needle-nose pliers | Closing jump rings and crimping wire ends |
| Jump rings or clasps | Connecting strands and securing ends |
| Bead needle or painter’s tape | Threading beads without fraying |
| Measuring tape | Cutting string to the correct length |
| Flat work surface or bead board | Laying out the bead pattern before stringing |
Having all tools ready before you start prevents mid-project stops that can cause tangles or lost beads.
How do you plan and design your crystal garland layout?
Planning your layout before you string a single bead saves time and prevents the most common mistakes in DIY crystal garlands. The two biggest errors crafters make are running out of beads mid-strand and ending up with uneven spacing.

Start by measuring the space where the garland will hang. Add 10–15% extra length to your string to account for knots, end loops, and natural drape. Cut your stringing material to that extended length before you do anything else.
Laying out beads on a flat surface before stringing lets you see the full pattern, check spacing, and catch any color or size imbalances. This step takes five minutes and saves far more time than fixing a strung garland that looks off. Arrange your beads in the exact sequence you plan to string them, working from one end to the other.
A few planning principles that make a real difference:
- Alternate bead sizes to create visual rhythm. A large faceted crystal followed by two small spacer beads repeats well across a long strand.
- Group by color if you want a gradient effect, or alternate colors for a more traditional look.
- Count your beads before you start. Divide the total bead count by the desired length to confirm you have enough for consistent spacing.
- Mark the center of your string with a small piece of tape so you can work outward from the middle for perfectly balanced garlands.
Pro Tip: Wrap a small piece of painter’s tape tightly around the end of your thread or fishing line to create a firm tip that threads through bead holes without fraying or bending. This simple trick works as well as a bead needle for most standard bead sizes.
What are the steps to assemble crystal garlands?
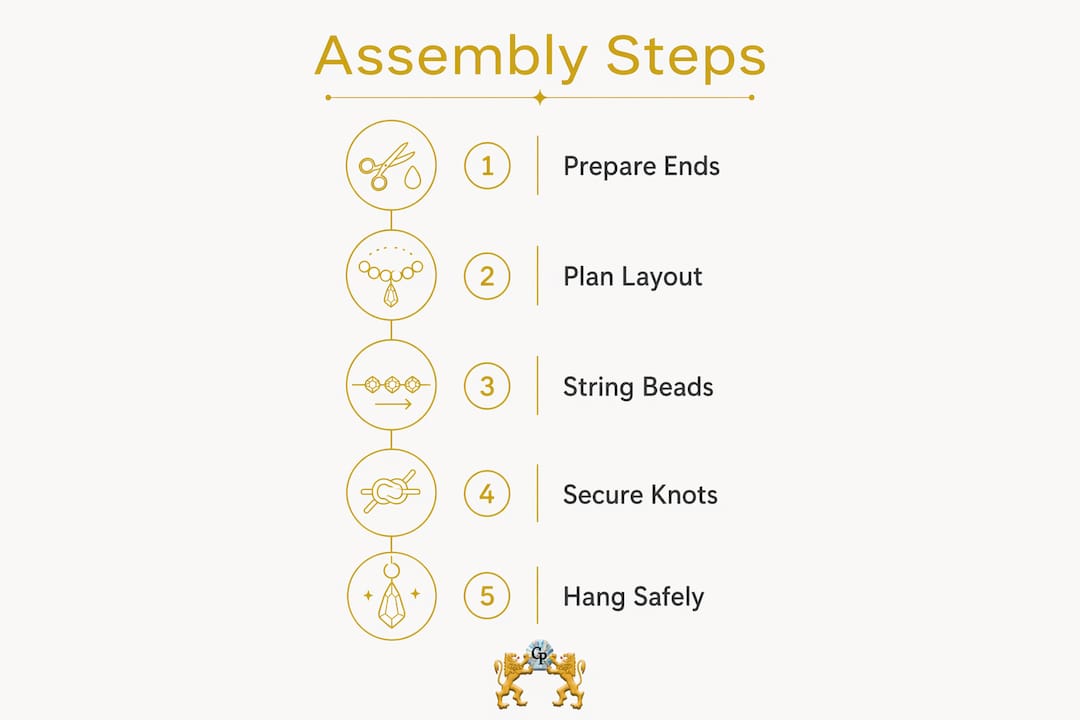
Follow these steps in order for a garland that holds together and looks professional.
-
Prepare your string ends. Cut your stringing material to the planned length. Wrap one end with painter’s tape or thread it through a bead needle. Tie a stopper knot at the opposite end, or attach a jump ring with pliers to anchor the first bead.
-
Thread beads in sequence. Pick up beads from your flat layout one at a time, following the pattern you planned. Do not rush this step. Sliding beads on in the wrong order means unstringing and starting over.
-
Maintain even tension. Keep the strand relaxed as you work. Pulling the thread too tight causes the finished garland to bow rather than drape. A slight amount of slack between beads creates the gentle curve that makes crystal garlands look elegant.
-
Secure the finishing end. Once all beads are strung, tie a firm knot at the open end. For fishing line or jewelry wire, use a crimp bead: slide it onto the wire, loop the wire back through it, and flatten it with pliers. This creates a secure, clean finish.
-
Attach jump rings. Add a jump ring to each end of the garland. Jump rings must be fully closed with pliers so crystals cannot slip free. An open jump ring is the most common cause of garland failure, so check each one twice.
-
Connect multiple strands. If your garland needs to be longer than one strand, link strands together using jump rings or small S-hooks. Make sure each connection point is as secure as the end rings.
| Step | Key action | Common mistake to avoid |
|---|---|---|
| Prepare ends | Tape or needle the threading end | Frayed ends that miss bead holes |
| Thread beads | Follow the planned sequence | Skipping the layout and guessing |
| Maintain tension | Keep slight slack in the strand | Pulling too tight, causing bowing |
| Secure ends | Knot or crimp firmly | Loose knots that slip under weight |
| Close jump rings | Fully close with pliers | Leaving gaps that release beads |
| Connect strands | Use jump rings or S-hooks | Knotting strands, which weakens joins |
Pro Tip: String a test section of 10–12 beads on your chosen material and hang it for 24 hours before committing to the full garland. This confirms the stringing material handles the bead weight without stretching or breaking.
How do you hang and display crystal garlands safely?
Hanging is where a well-made garland either shines or fails. The right installation method protects both the garland and the surface it attaches to.
Attaching crystal strands to chandeliers uses jump rings or clasps clipped to the chandelier frame, with pliers used to close each connection securely. The same approach works for curtain rods, mantle hooks, and decorative brackets. Always attach to a fixed point that can bear the weight of the full strand.
Key hanging and display tips:
- Allow a gentle drape. A slight slack in the strand creates an elegant curve and reduces stress on the attachment points. Taut garlands put constant tension on the knots and jump rings, shortening their lifespan.
- Use removable hooks for walls. Adhesive hooks rated for the garland’s weight protect walls from nail holes and make repositioning easy.
- Space multiple garlands evenly. For chandelier draping, measure the distance between attachment points before hanging so each strand falls at the same angle.
- Keep garlands away from heat sources. Crystal and fishing line both react to sustained heat. Avoid placing garlands directly over candles or hot bulbs.
- Clean gently. Wipe crystal beads with a soft, dry cloth. For deeper cleaning, a crystal-specific cleaning solution preserves the finish without damaging the stringing material. Learn more about restringing and care if a strand shows signs of wear.
Beaded garlands work across many settings, from chandelier draping to buffet table centerpieces and window displays. That versatility means one assembly method serves many different decorating projects.
Key Takeaways
Assembling crystal garlands requires the right stringing material, a planned bead layout, and properly closed connections at every end and join point.
| Point | Details |
|---|---|
| Choose synthetic stringing material | Nylon or fishing line outlasts natural fiber and supports heavier crystal beads. |
| Plan your layout first | Arrange beads on a flat surface before stringing to catch spacing and pattern errors early. |
| Close every jump ring fully | Use pliers to shut jump rings completely so no crystals can slip free under weight. |
| Allow drape when hanging | A slight slack in the hung strand looks better and reduces stress on attachment points. |
| Test before committing | String a short sample and hang it for 24 hours to confirm the material handles the bead weight. |
What I’ve learned from years of working with crystal garlands
The single biggest mistake I see crafters make is choosing stringing material by appearance rather than by weight capacity. A delicate thread looks right next to a crystal bead, but it snaps within weeks if the bead is heavy glass or genuine crystal. I always weigh a sample of beads before I choose my line. If the total strand will weigh more than a few ounces, I go straight to monofilament fishing line, regardless of how it looks. The crystals do the visual work. The line just needs to hold.
The second thing I’d tell any crafter is to respect the layout step. I used to skip it when I was in a hurry. Every time I did, I ended up unstringing at least part of the garland to fix an imbalance. Now I treat the flat layout as non-negotiable, even for short strands. Five minutes of planning saves thirty minutes of correction.
One creative tip worth trying: vary your garland length intentionally. Hanging three strands of different lengths from the same point creates a layered, cascading effect that a single uniform strand cannot match. You can see how this works beautifully on chandeliers and pendant fixtures. The assembly process is identical for each strand. The visual impact is completely different.
Enjoy the process. Crystal garlands are one of the few DIY projects where the finished result genuinely surprises you. The way light moves through a well-assembled strand is worth every careful step.
— BCC
Quality crystal garlands and materials from Crystalplace
Crystalplace has supplied authentic crystal products to homeowners, decorators, and event designers since 1992. Whether you are building your first DIY garland or restocking materials for a large event installation, Crystalplace carries a wide selection of faceted crystal bead strands and finished garlands ready to hang.

The Crystalplace catalog includes genuine Swarovski crystal options, custom-length garland strands, and all the accessories you need to complete your project. Orders over $22 ship free within the USA. Browse the full crystal garland collection to find the right beads, strands, and hardware for your next decorating project.
FAQ
What is the best stringing material for crystal garlands?
Clear monofilament fishing line or fine jewelry wire is the best choice for heavier crystal beads. Synthetic nylon thread works well for lighter bead garlands.
How do I keep beads from sliding off the ends of my garland?
Attach a fully closed jump ring to each end using needle-nose pliers. A crimp bead flattened over the wire also creates a secure stop that beads cannot pass.
How long does it take to assemble a crystal garland?
A standard 36-inch garland takes most crafters 30–60 minutes, including layout time. Longer or more complex patterns with alternating bead sizes take proportionally more time.
Can I connect multiple garland strands to make a longer piece?
Yes. Link strands end to end using jump rings or small S-hooks at each connection point. Close every ring fully with pliers to prevent separation under the garland’s weight.
How do I clean and maintain a finished crystal garland?
Wipe crystal beads with a soft, dry cloth for routine cleaning. Avoid soaking the stringing material in water, as prolonged moisture weakens both nylon and natural fiber threads over time.
Recommended
- How to Restring Crystal Garland Strands – CrystalPlace
- Step by Step Hanging Crystals for Stunning Home Decor – CrystalPlace
- Step by Step Crystal Suncatcher Hanging Guide – CrystalPlace
- Crystal Garlands That Transform a Chandelier – CrystalPlace