
Discover how to repair chandelier crystals with a step-by-step guide. Restore brilliance and elegance to your fixture for a flawless, sparkling finish at home.
Every Swarovski chandelier owner eventually faces the delicate task of keeping those dazzling crystals in peak condition. Over time, dust, fingerprints, and even loose connections can rob your prized fixture of its signature brilliance, especially if you have an intricate vintage or luxury model. Knowing how to inspect, clean, and handle each component not only protects your investment but restores the brilliant sparkle that transforms your home. Discover expert chandelier maintenance routines that revive shine while preventing costly mistakes during repair and restoration.
Table of Contents
- Step 1: Gather and Inspect Chandelier Crystals
- Step 2: Remove Damaged or Loose Crystals
- Step 3: Clean and Prepare Crystal Parts
- Step 4: Replace and Secure New Crystals
- Step 5: Verify Stability and Restore Shine
Quick Summary
| Key Point | Explanation |
|---|---|
| 1. Identify Crystal Types | Knowing whether crystals are glass, lead, plastic, or acrylic is crucial for proper handling and cleaning methods during maintenance. |
| 2. Systematic Removal Process | Remove damaged or loose crystals one at a time, documenting their positions to ensure correct reassembly later. |
| 3. Thorough Cleaning Steps | Use a gentle soap solution and distilled water to clean each crystal, ensuring complete drying before reinstallation to avoid water spots. |
| 4. Secure Installation of Crystals | Match replacement crystals correctly and use proper attachment methods to ensure they are secure and evenly spaced when reassembling. |
| 5. Regular Maintenance Schedule | Dust crystals and tighten connections every 3-6 months, deep clean annually, and inspect for corrosion to maintain chandelier brilliance and integrity. |
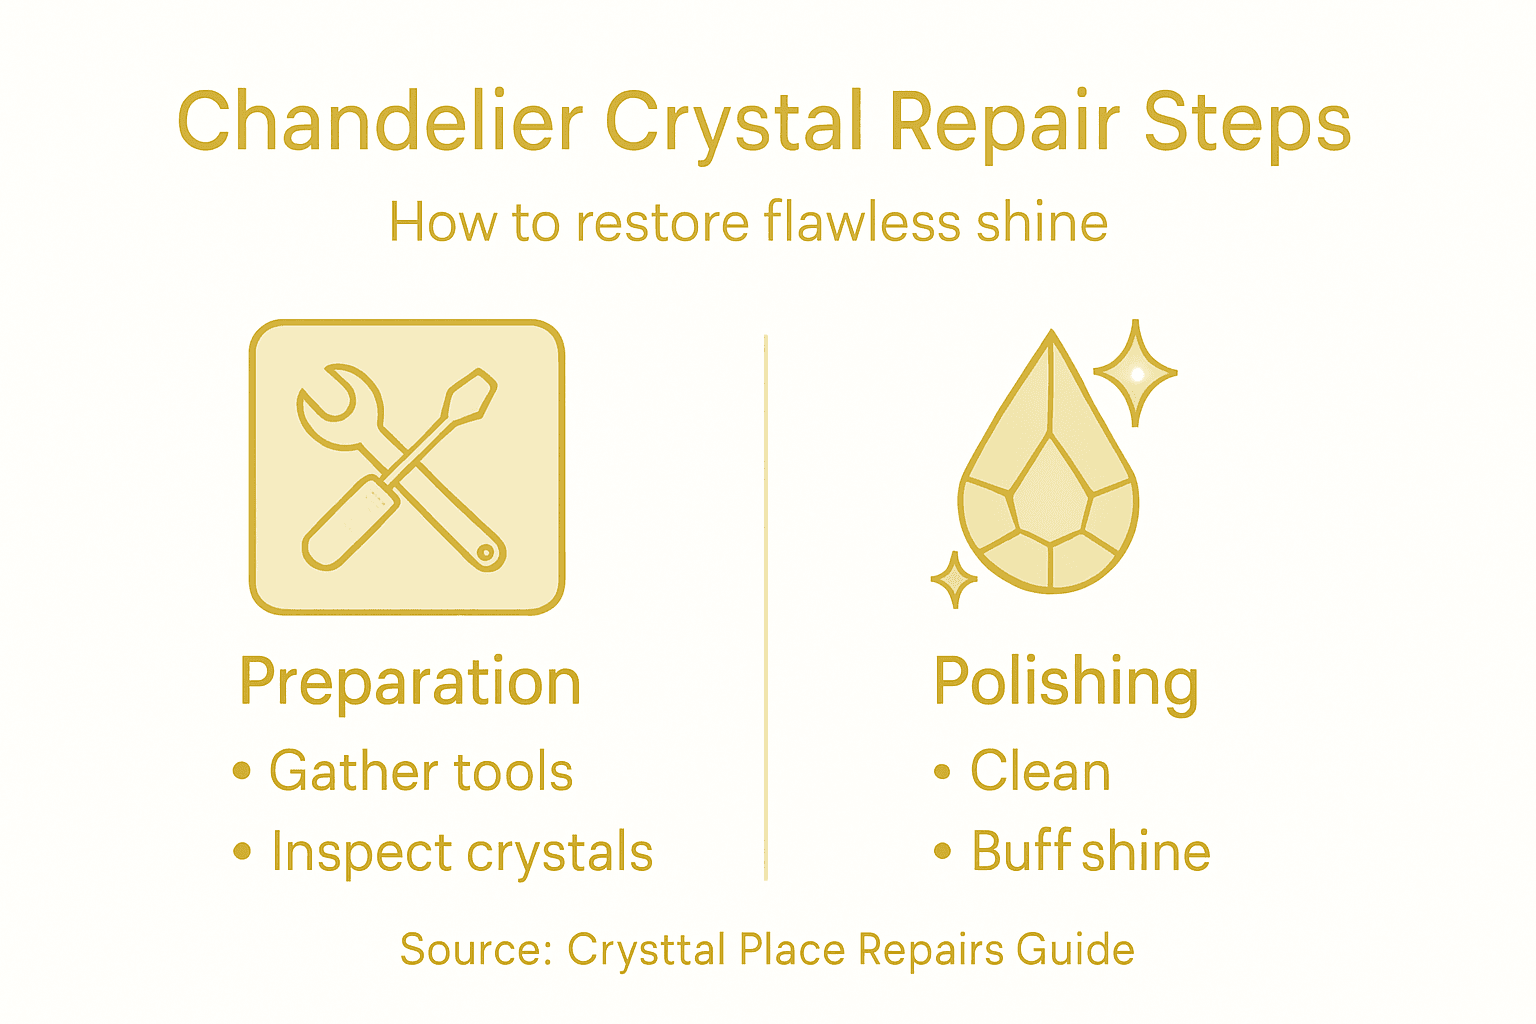
Step 1: Gather and Inspect Chandelier Crystals
Before you tackle any repairs, you need to understand what you’re working with. Gathering and inspecting your chandelier crystals helps you identify damage, plan your repair strategy, and avoid costly mistakes.
Start by identifying the type of crystals you have. Glass, lead crystal, plastic, and acrylic each require different handling approaches. Lead crystal is heavier and more delicate than acrylic, so knowing the difference matters when you’re removing and reinstalling pieces.
Set up a safe workspace before you begin. Clear a large, flat surface—a dining table works well—and cover it with a soft cloth or towel. This prevents crystals from rolling away and protects them from scratches. Gather your supplies in one spot so you can work efficiently.
Next, systematically remove each crystal. Some chandeliers have crystals that simply lift off their hooks, while others require gentle wiggling or careful unclipping. Take photos as you go so you remember which crystal goes where. Label each piece if your chandelier has multiple crystal types.
For quick reference, here is a comparison of common chandelier crystal types and their care requirements:
| Crystal Type | Appearance | Handling Needs | Typical Cleaning Method |
|---|---|---|---|
| Lead Crystal | Heavy, highly refractive | Very delicate; avoid force | Mild soap, distilled water rinse |
| Glass | Medium weight, shiny | Handle gently; can chip easily | Warm soapy water; rinse well |
| Acrylic | Lightweight, less shiny | Less fragile; avoid scratching | Gentle soap, soft cloth wipe |
| Plastic | Lightweight, duller | Less delicate; avoid harsh agents | Light soap and water wipe |
As you remove them, inspect each crystal carefully. Look for these common issues:
- Cracks, chips, or cloudy spots that affect light refraction
- Loose or corroded wire connections
- Dust buildup in corners or along the edges
- Misalignment or bent prongs
- Dullness compared to other crystals
Understanding crystal type and condition directly impacts how you’ll approach the repair process. Write down any problems you find, especially if several crystals show the same wear pattern.
Check your chandelier frame too. Look for corrosion, loose sockets, or damaged hooks that might have caused crystal problems. These frame issues need fixing before you reinstall crystals, or the same damage will repeat.
Once you’ve inspected everything, organize your crystals by condition. Group damaged pieces separately from those that just need cleaning. This keeps your repair work focused and prevents mixing up parts.
Your inspection determines whether you’re cleaning, repairing, or replacing each crystal, so take this step seriously.
Pro tip: Use a clear plastic storage container with compartments to keep crystals organized by size and condition; photograph each section to remember the exact layout when reassembling your chandelier.
Step 2: Remove Damaged or Loose Crystals
Now that you’ve inspected your chandelier, it’s time to carefully remove the damaged or loose pieces. Gentle removal prevents further damage to connectors, adjacent crystals, and the chandelier frame itself.
Before you start, put on cotton gloves to protect crystals from fingerprints and oils. Even though you’re removing damaged pieces, keeping them clean makes reassembly easier and maintains their appearance.
Work on one crystal at a time. Most crystals attach via hooks, pins, or clips. Identify which type you’re dealing with before pulling. If a crystal is simply hooked on, gently lift it straight up with a steady hand. Don’t twist or wiggle it side to side.
For crystals affixed by pins, you’ll need more precision. Gentle detachment of pinned crystals requires lifting the ledge or metal bracket that holds the pin in place. Support the crystal from underneath with your other hand so it doesn’t drop. Once the pin slides free, set the crystal down carefully on your workspace.
If a crystal feels stuck, don’t force it. A little light pressure from a flathead screwdriver under the metal connector can help release it without breaking anything. Work slowly and patiently here.
As you remove each piece, follow this process:
- Note its position or take a photo
- Mark the connector or hook if it’s corroded or damaged
- Place the crystal in your storage container
- Set aside any metal components that came loose
Stay organized throughout. Crystals that look identical often fit differently depending on their placement in the chandelier. Keep them grouped by location so you remember where each one goes.
Once you’ve removed all damaged pieces, assess what needs replacing versus what can be repaired. Some crystals just need cleaning. Others have irreparable damage and should be replaced with matching pieces from Crystal Place.
Slow removal prevents cascading damage that can turn one broken crystal into a chain reaction of problems.
Pro tip: Use a soft foam mat or folded towel as a work surface for removed crystals, and number each storage slot to match the chandelier’s positions for foolproof reassembly.
Step 3: Clean and Prepare Crystal Parts
Clean crystals are essential for the flawless shine you’re after. This step removes built-up dust, grime, and oxidation that dull even the finest Swarovski crystals.
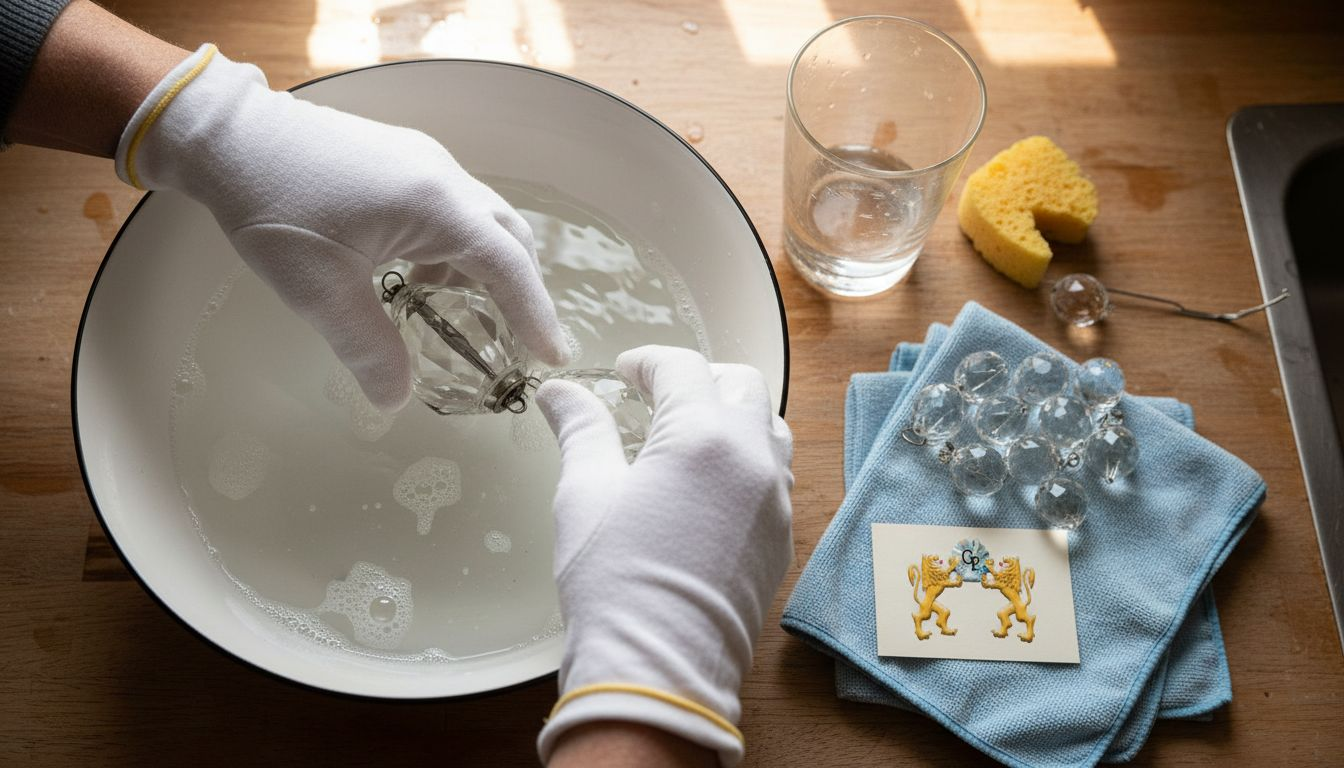
Start by preparing your cleaning station. You’ll need warm water, mild dish soap, distilled water for rinsing, and lint-free cloths. Gather cotton gloves, a soft sponge or microfiber cloth, and a drying rack or towel to set cleaned pieces on.
Fill a bowl with warm water and add just a drop or two of mild dish soap. The solution should be gentle, not sudsy. Cleaning crystal chandelier parts with the right solution removes years of grime without damaging delicate surfaces.
Wash each crystal individually by gently rubbing it with your soft cloth or sponge. Pay special attention to corners and crevices where dust collects. Work slowly and avoid aggressive scrubbing, which can scratch the surface.
Here’s your cleaning workflow:
- Submerge the crystal in soapy water for a few seconds
- Gently wipe all surfaces with your soft cloth
- Rinse thoroughly under running distilled water
- Place on a lint-free cloth to air dry completely
- Inspect for any remaining spots before moving forward
After washing, the rinsing step matters more than you’d think. Tap water leaves mineral deposits that cloud clarity. Always use distilled water for the final rinse to achieve that brilliant sparkle.
Once crystals are clean and completely dry, inspect the metal connectors and hooks. If they show corrosion or rust, you’ll need to address those before reassembly. Corroded connectors can damage fresh crystals.
Drying is non-negotiable. Even a tiny water spot ruins the effect you’re working toward. Allow at least an hour for air drying, or gently pat crystals with a lint-free cloth and let them sit overnight.
Mineral-free water and complete dryness transform cloudy crystals into brilliant light reflectors.
Pro tip: Wear cotton gloves during the entire cleaning and drying process to prevent fingerprints and oils from transferring back onto the crystals you just cleaned.
Step 4: Replace and Secure New Crystals
With damaged pieces removed and everything cleaned, you’re ready to install fresh crystals. This step transforms your chandelier back into a light-catching centerpiece with restored brilliance.
Before installing anything, verify you have the correct replacement crystals. Match them to the original pieces in shape, size, and weight. Using mismatched crystals throws off your chandelier’s balance and visual harmony.
Gather your tools and materials. You’ll need pliers for working with jump rings or wire connectors, replacement crystals, and any additional hardware like wire or clips. Having everything ready prevents fumbling mid-installation.
Attaching crystals requires proper connection methods that keep them secure without stressing the fixture. Common attachment options include jump rings, twisted wires, and clips. Your original chandelier design determines which method you’ll use.
Install crystals in a systematic order. Work from one arm of the chandelier to another, completing one section before moving to the next. This approach keeps you organized and prevents confusion about placement.
Here’s your installation sequence:
- Position the crystal against its connector
- Secure the attachment method using pliers if needed
- Gently tug to confirm it’s holding firmly
- Step back to check alignment and spacing
- Move to the next position
Don’t rush the securing step. A properly installed crystal won’t wiggle or shift when you gently move it by hand. If it feels loose, remove it and reinforce the connection.
Once all crystals are installed, perform a full visual inspection. Scan for misaligned pieces, uneven spacing, or crystals that catch light differently. Small adjustments now prevent problems later.
Check the overall weight distribution as you work. Chandeliers are engineered with balance in mind. Avoid clustering heavy crystals on one side, which stresses the fixture.
A crystal that moves when touched will eventually fall, so take time to secure each one completely before moving forward.
Pro tip: Install and secure crystals in natural light or with a flashlight nearby so you can immediately see how each piece catches and reflects light, allowing you to spot any that need repositioning.
Step 5: Verify Stability and Restore Shine
Your chandelier is nearly complete. Now you’ll verify everything is secure and restore that brilliant sparkle that makes the whole fixture come alive.
Start by testing crystal stability. Gently grasp each crystal and try to move it side to side. It should feel completely immobile. If any crystal wiggles, remove it and reinforce the connection immediately. A loose crystal will fall eventually.
Check all metal connectors and hooks while you’re at it. Look for any signs of corrosion that might compromise security. Tighten any loose frame connections using the appropriate tools. A solid structure supports safe, long-term display.
With everything secure, focus on restoration. Your crystals are clean but may still lack their full brilliance. Polishing crystal surfaces restores their luminous quality and maximizes light refraction.
Use a microfiber cloth or specialized crystal polishing cloth to gently buff each crystal. Work in small circular motions, paying attention to facets and edges. This removes any remaining water spots and brings out the internal sparkle.
For metal components like brass or chrome connectors, use an appropriate metal polish. Follow the manufacturer’s directions and work in ventilated areas. Polished metal enhances the overall effect significantly.
Here’s your final verification checklist:
- Each crystal is immobile when tested gently
- All metal connections are tight and secure
- No visible corrosion or damage remains
- Crystals are polished and spot-free
- Frame sits level without wobbling
- Electrical connections are intact if applicable
Once you’ve completed this checklist, turn on your chandelier and observe it from different angles. The light should refract through each crystal without obstruction. Take a moment to appreciate your work.
A chandelier that sparkles brilliantly today will continue doing so only if you maintain its structural integrity from the start.
Pro tip: Schedule routine maintenance every three to six months using a dry microfiber cloth to dust crystals and tighten connections, which prevents future damage and extends your chandelier’s lifespan significantly.
Here is a helpful summary of essential chandelier maintenance tasks and their recommended frequency:
| Maintenance Task | Recommended Frequency | Benefit |
|---|---|---|
| Dusting crystals | Every 3-6 months | Prevents dullness, sparkle |
| Tightening connections | Every 3-6 months | Avoids loose or lost crystals |
| Deep cleaning | Once a year | Removes grime and residues |
| Inspecting for corrosion | Annually | Prevents frame deterioration |
Restore Your Chandelier’s Shine with Authentic Crystals from Crystal Place
If you just finished inspecting and repairing your chandelier crystals but found some pieces damaged or missing, finding the right replacements is crucial. The article highlights common challenges such as correctly identifying crystal types and securely attaching new parts to avoid future damage. You want your chandelier to reflect light flawlessly and stay stable for years to come.

Discover a wide selection of genuine Swarovski and authentic chandelier crystals at Crystal Place. Whether you need crystal prisms, finishing finials, or specific replacement parts, our collection guarantees high-quality craftsmanship designed for easy installation and lasting brilliance. Explore expert-approved accessories and even custom-designed chandeliers that can bring your space back to life. Act now to secure free shipping on orders over $22 within the USA and ensure your repair project has the finest materials from trusted crystal brands. Visit our main site, check out our crystal chandelier cleaning solutions and find your perfect parts today.
Frequently Asked Questions
How can I identify the type of crystals in my chandelier?
To identify the type of crystals in your chandelier, inspect them for weight and clarity. Lead crystal is heavier and more refractive, while acrylic is lighter and less shiny. Take note of these differences as they will dictate how you handle repairs.
What steps should I follow to clean chandelier crystals effectively?
To clean chandelier crystals effectively, first prepare a gentle cleaning solution with warm water and mild dish soap. Submerge each crystal, wipe with a soft cloth, rinse with distilled water, and let them air dry completely. This method removes accumulated dirt and restores sparkle.
How do I remove loose or damaged crystals from my chandelier?
Gently lift or unclip the loose or damaged crystals, taking care not to force them. If a crystal is stuck, use a flathead screwdriver to release it carefully. Work one crystal at a time and organize them by location to maintain proper reassembly later.
What should I do if I find corrosion on metal connectors or hooks?
If you find corrosion on metal connectors or hooks, address it before reinstalling any crystals. Clean the affected areas with a suitable metal polish to restore integrity. Ensuring all connectors are in good condition helps maintain the stability of your chandelier.
How can I verify that the crystals are securely reassembled?
To check if the crystals are securely reassembled, gently grasp each one and see if it moves. If any crystal wiggles, remove it and reinforce the connection immediately. This step ensures that all crystals are stable and will not fall or become loose over time.
How often should I perform maintenance on my chandelier to keep it shining?
Perform maintenance on your chandelier every 3–6 months to keep it shining brilliantly. This includes dusting crystals and tightening connections to prevent any wear and tear. Regular upkeep allows your chandelier to maintain its beautiful appearance and longevity.
Recommended
- Revive the Sparkle: Restoring Your Crystal Chandelier – CrystalPlace
- 7 Chandelier Restoration Techniques That Work – CrystalPlace
- What Is Chandelier Repair: Restoring Brilliance Safely – CrystalPlace
- Best Cleaner for Chandeliers: What Works – CrystalPlace
- Jewelry Cleaning at Home: Restore Shine Safely and Easily – Malibu Vibes Jewelry