
Revive your lighting with our step by step chandelier maintenance guide. Restore brilliance easily and keep your fixture shining for years!
TL;DR:
- Proper chandelier maintenance involves organized disassembly, careful cleaning, and safety precautions.
- Regular dusting and using correct cleaning solutions maintain crystal brilliance and fixture longevity.
- Professional help is recommended for high or complex fixtures to ensure safety and thorough cleaning.
You walk into your dining room one afternoon and notice it: the chandelier that once caught every glint of sunlight now looks dull, almost flat. Dust has settled on the crystals, and fingerprints from the last bulb change have left hazy smudges that dim the sparkle you paid good money for. Crystal chandelier maintenance feels like a big job, but it doesn’t have to be overwhelming. This guide breaks the entire process down into manageable, clearly organized steps, so you can restore your fixture’s brilliance safely and keep it looking exceptional for years to come.
Key Takeaways
| Point | Details |
|---|---|
| Safety first | Always cut power at the breaker and use proper protection before cleaning. |
| Right tools matter | Gather all supplies and cleaning solutions before you start for smooth maintenance. |
| Deep clean method | Photograph, disassemble carefully, wash crystals and metal separately, and reassemble with patience. |
| Preventive care | Dust regularly and use LED bulbs with dimmers to maintain shine and prolong fixture life. |
| Professional help is wise | Hire experts or use scaffolding for hard-to-reach chandeliers to avoid accidents and ensure thorough cleaning. |
Gather your tools and prepare the space
Once you understand why maintenance matters, the first step is getting set up safely with the right tools and precautions. Rushing into a cleaning session without proper preparation is one of the most common mistakes chandelier owners make, and it can turn a simple cleaning task into a hazardous or costly one.
The single most important rule before you touch anything: turn off power at the breaker before cleaning, and allow the fixture to cool completely. Bulbs, especially older incandescent types, retain significant heat for up to 15 minutes after shutoff. Touching a warm bulb or socket with a damp cloth or cleaning solution is a genuine safety risk. Don’t rely on just flipping the wall switch; go to the breaker panel and cut power to the circuit entirely.
Next, set up your workspace. Use protective coverings like drop cloths on floors beneath the chandelier to catch any drips or falling parts. Place a thick moving blanket or folded towels directly under the fixture for extra cushioning in case a crystal slips. For access, a stable stepladder works for fixtures at standard ceiling heights. For anything over 10 feet, consider renting a telescoping ladder or a scaffolding platform. Your safety during safe chandelier cleaning is non-negotiable.
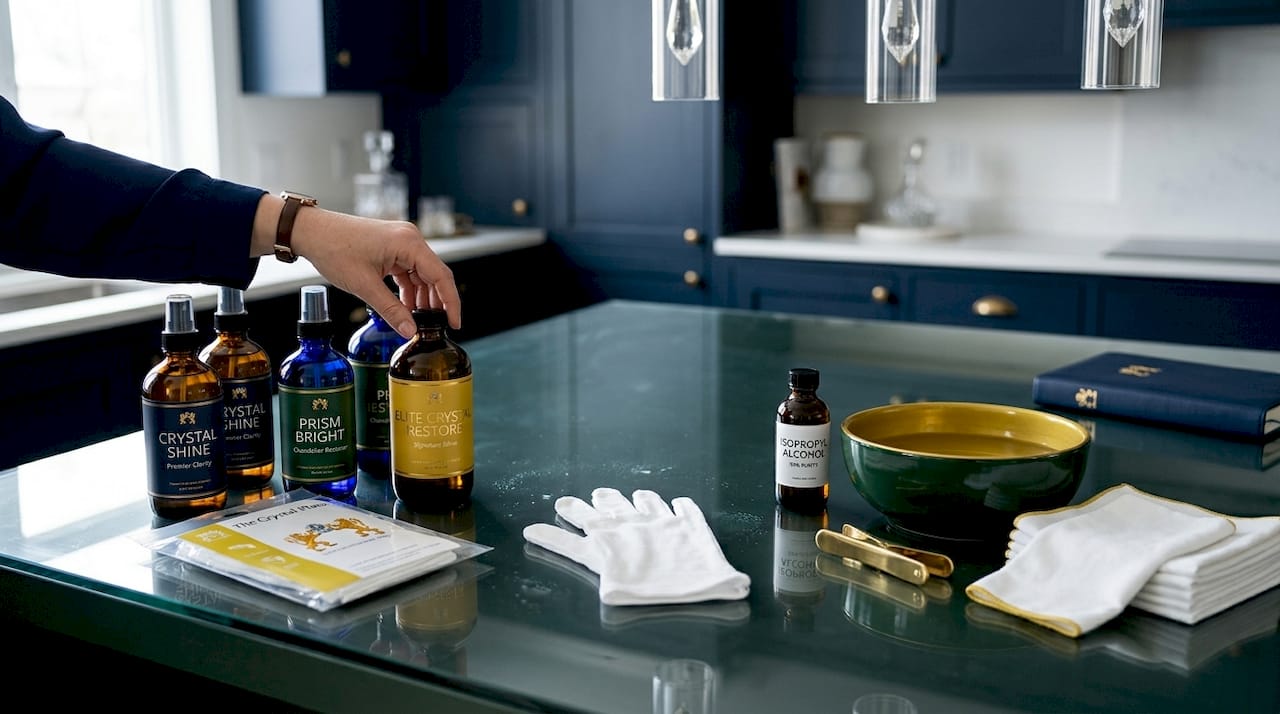
Before you climb up, gather every supply you’ll need. Running up and down a ladder mid-task wastes time and creates risk. Use the following chandelier cleaning checklist as your starting point:
Supplies you’ll need:
- Lint-free white cotton gloves (at least two pairs)
- Microfiber cloths, minimum four
- Soft-bristle paint brush or a dedicated crystal dusting brush
- Shallow plastic bins or bowls for washing crystals
- Distilled water (tap water leaves mineral deposits)
- Isopropyl alcohol (70% concentration)
- Mild dish soap
- A soft towel or padded mat for laying out removed crystals
- Zip-lock bags or small labeled containers for hardware
- A digital camera or smartphone for photographing the fixture before disassembly
| Tool | Why it matters |
|---|---|
| Lint-free gloves | Prevents oil from fingers transferring to crystal surfaces |
| Distilled water | Eliminates mineral streaks from tap water minerals |
| Microfiber cloths | Picks up dust without scratching delicate crystal surfaces |
| Labeled containers | Keeps screws and pins organized for accurate reassembly |
| Drop cloths | Protects flooring and catches any fallen hardware |
Safety first: Always cut power at the breaker, not just the wall switch, and wear gloves throughout the cleaning session. Never spray any liquid directly onto electrical sockets, arms, or wiring. If you’re unsure about your fixture’s wiring, contact a licensed electrician before proceeding.
Choose the right cleaning solutions
With your space protected and supplies ready, the next decision is choosing the right solution to clean delicate crystals and metal frames. This step is where many well-meaning homeowners make mistakes that can permanently cloud crystals or tarnish the fixture’s metal finish.
Your two main paths are DIY solutions or commercial chandelier cleaners. A reliable DIY mix uses isopropyl alcohol at a 1:3 ratio with distilled water, or a mild vinegar and distilled water blend, but always test a small hidden area first. These work well for light to moderate buildup on crystal surfaces and are gentle enough for most lead crystal and Swarovski-grade materials.
Commercial chandelier cleaners offer convenience and are often formulated to evaporate quickly without streaking. They’re worth the investment if your fixture has a complex design with hundreds of hanging crystals, where a thorough rinse-and-dry method is time consuming. Browse reliable best cleaners for chandeliers options before committing to one product.
What to avoid: ammonia-based cleaners and undiluted vinegar should never touch metal frame components. Ammonia and vinegar on metals cause pitting, discoloration, and accelerated tarnish, especially on gold or silver-plated finishes. The frame on your chandelier is often as expensive and as visually important as the crystals themselves, so treat it accordingly.
When to use each cleaning formulation:
- Alcohol and distilled water mix: Best for regular deep cleans on crystal prisms and drops
- Commercial spray cleaner: Ideal for between-season quick refreshes without disassembly
- Mild dish soap in warm distilled water: Best for hand-washing individual crystals during full disassembly
- Dry microfiber cloth only: Sufficient for light monthly dusting to remove surface dust
For a detailed breakdown of which products perform best on specific crystal types, this cleaner guide for chandeliers covers the full range of options with clear recommendations.
| Solution type | Safe for crystals | Safe for metal frame | Effort level |
|---|---|---|---|
| Isopropyl alcohol + distilled water | Yes | No (avoid contact) | Medium |
| Commercial chandelier spray | Yes | Check label | Low |
| Mild soap + distilled water | Yes | Light contact only | Medium |
| Ammonia-based glass cleaner | No | No | Low but risky |
Pro Tip: Always put on fresh cotton gloves before handling crystals, even after washing your hands. Natural oils from skin transfer instantly to crystal surfaces and create new smudges that require a second cleaning pass.
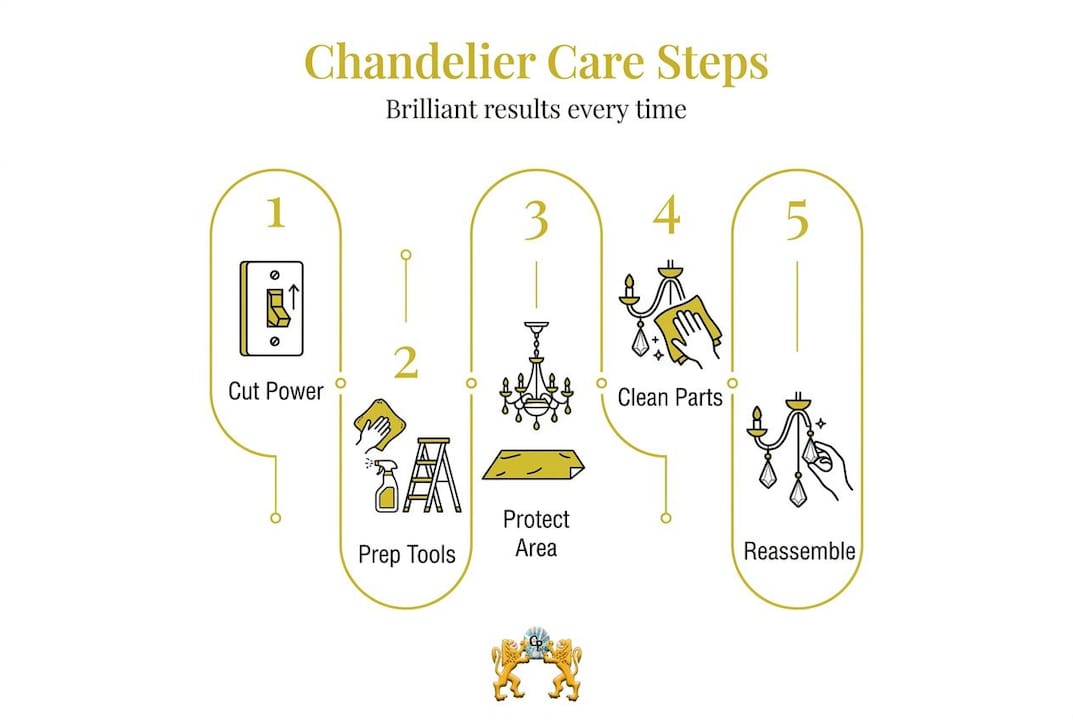
Step-by-step cleaning: Disassembly, washing, and reassembly
After you have your cleaning solution ready, it’s time to tackle the most important maintenance phase: careful, organized cleaning from top to bottom. Skipping organization here almost guarantees frustration during reassembly, especially on multi-tiered fixtures with dozens of matching arms and strands.
Here is the complete step-by-step cleaning process for a thorough deep clean:
-
Photograph everything first. Before removing a single crystal, take multiple photos of the chandelier from different angles. Capture close-up shots of each tier, showing how strands connect and which crystals attach where. This photo record is your reassembly map.
-
Remove crystals one section at a time. Work from the top tier down. Place removed crystals directly onto your padded mat in the same order they came off. Do not mix crystals from different sections, as sizing can be nearly identical but subtly different. Use labeled bags for any metal pins, hooks, or connectors.
-
Disassemble and wash each crystal in lukewarm soapy distilled water. Use your fingertips (gloved) to gently rub away grime. Never use abrasive sponges or anything with a rough texture. Swarovski and high-lead crystals scratch more easily than people expect.
-
Rinse thoroughly with plain distilled water. This step matters more than the washing itself. Any soap residue left on crystal surfaces will dry into a film that reduces brilliance dramatically.
-
Dry each crystal completely with a lint-free cloth. Use a blotting and polishing motion, not a rubbing one. Hold the crystal up to a light source to check for water spots or streaks before setting it aside.
-
Clean the frame while crystals dry. Wipe down metal arms, the canopy, and the chain with a damp microfiber cloth. For stubborn grime in ornate crevices, use a soft-bristle brush. Avoid letting moisture sit on the frame.
-
Reassemble using your photos as a guide. Work from the bottom tier upward, which is the reverse of how you disassembled. Check each crystal’s hang angle as you go.
When to call a professional: For chandeliers mounted at ceiling heights over 14 feet, or fixtures with hundreds of individually wired crystals, professionals using lifts and scaffolding are the safer and often more cost-effective choice. The risk of injury or dropping an irreplaceable crystal section far outweighs the cost of a professional cleaning service.
For a more thorough look at the efficient chandelier cleaning method, including tips for extra-large or custom fixtures, detailed walkthroughs are available to guide you through every scenario.
Pro Tip: Clean one complete section of your chandelier at a time and put it fully back together before moving on. This prevents mix-ups between crystal sizes, keeps your workspace manageable, and reduces the chance of a small part rolling off the edge of your ladder.
Maintain shine and performance after cleaning
Once your chandelier is reassembled and gleaming, a few simple routines will help you keep it that way with minimal effort. Post-cleaning care is where most homeowners skip steps, which means their next full cleaning session requires twice the work.
Start with your bulbs. Switching to LED bulbs and dimmers reduces the heat output of your fixture significantly, which slows dust adhesion and prevents crystals from yellowing over time. Heat from traditional incandescent bulbs actually acts like a magnet for airborne grease particles, especially in dining rooms near a kitchen. LEDs run cooler, which translates directly to a cleaner-looking chandelier between maintenance sessions.
Ongoing maintenance habits to build:
- Dust crystals monthly using a clean, dry microfiber cloth or soft brush
- Inspect all crystal connections every three months for loose pins or bent hooks
- Check for any crystals that have shifted position or lost their correct hang angle
- Replace any burnt-out bulbs promptly to prevent uneven heat distribution across the fixture
- Avoid aerosol air fresheners or cooking sprays near the chandelier, as they coat crystal surfaces with a sticky film that attracts dust rapidly
Setting a reminder on your phone or calendar is the simplest way to stay consistent with crystal maintenance for shine. Treat your chandelier the same way you treat other luxury fixtures in your home: with a scheduled routine rather than a reactive one. A chandelier cleaning schedule that fits your lifestyle prevents both frustration and costly repairs.
| Maintenance type | Recommended frequency | Time required |
|---|---|---|
| Light dusting (dry cloth) | Monthly | 10 to 15 minutes |
| Surface spray clean | Every 3 to 4 months | 20 to 30 minutes |
| Full deep clean with disassembly | Every 6 to 12 months | 2 to 4 hours |
| Professional inspection | Every 2 to 3 years | Varies |
Pro Tip: Keep a dedicated photo log for your chandelier. After each deep clean and reassembly, take a fresh set of reference photos. Store them in a labeled album on your phone or in a cloud folder. Over time, this archive also helps you notice gradual changes in the fixture, like crystals that have shifted or strands that sag slightly, before they become bigger problems.
Our honest take: Why effective chandelier care is misunderstood
We’ve been sourcing and supplying authentic crystal products since 1991, and one pattern stands out clearly: most chandelier owners don’t skip maintenance because they’re lazy. They skip it because the process feels overwhelming, and so they do a rushed surface wipe and convince themselves it’s enough.
The real issue is that a quick wipe moves surface dust around but does nothing for the greasy, sticky buildup that forms in layers over months. This hidden film is what actually blocks light refraction, turning a brilliant fixture into a flat, dull one. By the time most people notice the sparkle is gone, the buildup has bonded to the crystal surface and requires a full disassembly cleaning to fix. A rushed approach doesn’t just fail to clean; it delays the point at which you realize a deeper problem exists.
We’ve also seen homeowners invest heavily in expensive commercial spray cleaners and expect a single spritz to do what only a systematic process can accomplish. No product, regardless of how good it is, replaces the value of organized disassembly, careful hand-washing, and thorough drying. The good news is that once you’ve gone through a full deep clean properly, the maintenance cycles afterward become much shorter and easier because you’re no longer battling years of accumulated grime.
The professional habits outlined in this guide, like photo documentation, section-by-section work, and labeled hardware storage, aren’t complicated. They’re just deliberate. And the value of being deliberate is that you protect both the visual beauty and the monetary investment your chandelier represents. Understanding why clean chandelier crystals matter beyond aesthetics, including how light performance and fixture longevity are directly tied to cleanliness, changes the way most homeowners approach this task permanently.
Next steps: Bring even more brilliance to your chandelier
Keeping your chandelier at peak brilliance is a long-term commitment, and you don’t have to do it alone.

At Crystal Place, we’ve helped homeowners and decorators care for their crystal fixtures since 1991. Our selection includes professional-grade chandelier cleaning solutions, authentic Swarovski replacement crystals, and specialty parts for repair and restoration. If a cleaning session reveals a damaged crystal strand or a worn connector, we have the exact components to restore your fixture to its original design. Visit us to browse specialized cleaning products, explore our full chandelier maintenance checklist, and find resources tailored to every maintenance challenge. We offer free shipping on orders over $22 within the USA, making it easy to stock up on everything you need.
Frequently asked questions
How often should I deep clean my crystal chandelier?
A deep clean is typically recommended once or twice a year, while light dusting can be done monthly. Deep cleans every 6 to 12 months are the standard across most maintenance schedules.
Can I clean a chandelier without taking it apart?
Yes, you can perform a surface clean using a gentle spray solution, but full brilliance often requires careful partial disassembly. Surface cleaning methods work for minor upkeep between full deep clean sessions.
What is the safest way to clean crystal pieces?
Wash crystals in lukewarm soapy distilled water, rinse with plain distilled water, and dry with a lint-free cloth to avoid residue. This disassembly cleaning method consistently delivers the best results for restoring brilliance.
Should I use gloves when cleaning my chandelier?
Yes, gloves prevent fingerprints and keep crystal surfaces pristine during maintenance. Even clean hands transfer oils to crystals instantly, creating smudges that require a second cleaning pass.
What if my chandelier is hard to reach?
For high ceilings or complex fixtures, consider professional help or use scaffolding for safety. Professionals using lifts are recommended for any chandelier mounted above 14 feet to avoid injury and damage to the fixture.
Recommended
- How to Restore Chandelier Sparkle – CrystalPlace
- Crystal Chandelier Maintenance 2026: 65% Retain Shine – CrystalPlace
- Why maintain chandelier crystals for lasting sparkle – CrystalPlace
- Chandelier maintenance checklist: keep crystals sparkling – CrystalPlace
- Caring for Your Fine Jewelry From Bel Viaggio Designs – Bel Viaggio Designs, LLC