

Explore our comprehensive DIY crystal bead strands guide. Learn to choose materials and techniques for stunning, long-lasting creations!
TL;DR:
- DIY crystal bead strands require proper materials, pattern planning, and finishing techniques to ensure durability and sparkle. Choosing the right bead types, stringing materials, and tools, along with testing before full assembly, helps achieve a professional look. Patience and attention to detail are essential for creating strands that last and visually impress.
Crystal bead strands are decorative lengths of faceted or smooth beads threaded onto wire, cord, or monofilament to create garlands, curtains, necklaces, and event decor. This DIY crystal bead strands guide covers every step you need: choosing the right beads, picking the correct stringing material, assembling your strand, and finishing it so it holds up over time. Crystalplace has supplied authentic crystal products since 1992, and the techniques here reflect the same standards used by professional decorators and lighting designers. Whether you are making a window curtain or a chandelier garland, the right materials and methods make the difference between a strand that lasts years and one that snaps after a week.
What materials do you need for DIY crystal bead strands?
The right materials determine how long your strand lasts and how well it sparkles. Cutting corners on stringing material is the single most common reason bead strands fail.
Bead types and finishes
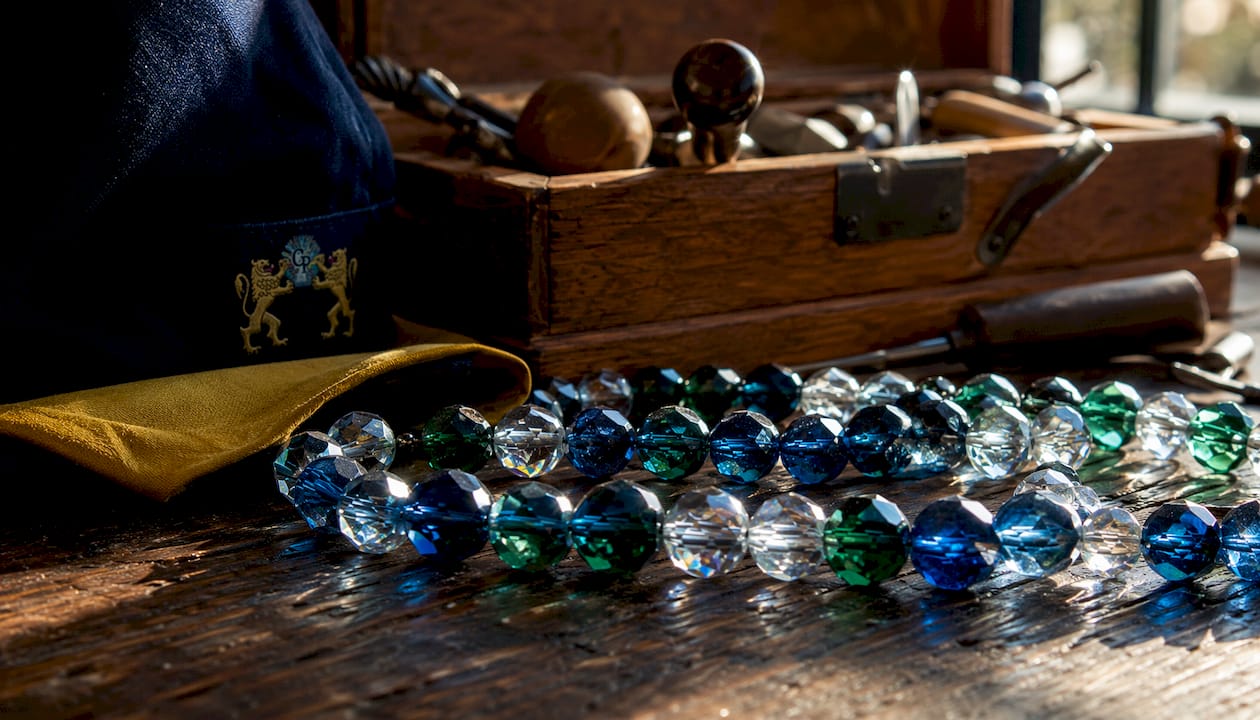
Faceted crystal beads catch and scatter light far better than smooth round beads. The facets act like tiny mirrors, bouncing light in multiple directions. AB (Aurora Borealis) coating maximizes light refraction and produces vibrant color displays in sunlight, making it the top choice for window hangings and event decor. Clear faceted beads work well for classic chandelier garlands, while AB-coated beads add a rainbow shimmer that works beautifully in natural light.
Stringing materials
Monofilament fishing line and nylon-coated beading wire are the two most reliable stringing materials for decorative crystal strands. Monofilament is nearly invisible, which keeps the focus on the beads. Nylon-coated wire adds strength for heavier strands. Elastic cord works well for stretch bracelets, but pre-stretching it before stringing increases durability significantly. Wire gauge matters: wire over 1mm is too rigid for delicate crystal beads, and the ideal thickness sits between 0.3mm and 0.5mm to balance flexibility with strength.
Tools you need
| Tool | Purpose |
|---|---|
| Round-nose pliers | Forming loops and closing jump rings |
| Flat-nose pliers | Squeezing crimp beads flat |
| Wire cutters | Trimming wire cleanly without fraying |
| Bead mat | Keeping beads organized and preventing rolling |
| Crimp beads | Securing strand ends without bulky knots |
| Scissors | Cutting cord or monofilament |
Every tool on this list earns its place. A bead mat alone saves you from chasing beads across the floor for an hour.
How do you string crystal beads step by step?
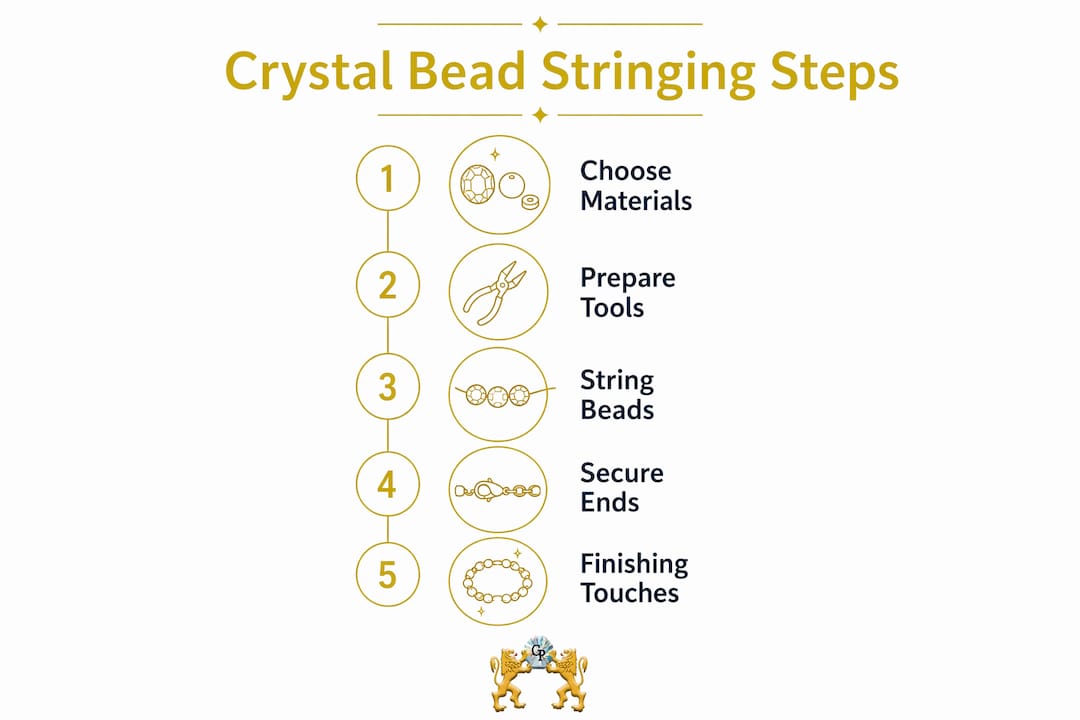
A clear sequence prevents the most common mistakes. Follow these steps whether you are making a short garland or a full beaded curtain.
- Measure and cut your string. Add at least 6 inches beyond your target length. You need that extra length for knotting, crimping, and any adjustments.
- Plan your bead pattern on the mat. Lay out your full design before threading a single bead. This lets you spot color imbalances or awkward size transitions before they are locked in.
- Thread a crimp bead first. Slide it to within 1 inch of one end, loop the wire through a clasp or anchor ring, then feed the wire back through the crimp bead. Squeeze the crimp gently with flat-nose pliers.
- String your beads in sequence. Follow the pattern you laid out on the mat. Work slowly and check the pattern every 10–15 beads.
- Leave 1–2 inches of breathing room at the top of the strand. This breathing room allows the strand to hang naturally and prevents the wire from pulling tight under the weight of the beads.
- Secure the finishing end. Thread a crimp bead, loop through your anchor point, feed back through the crimp, and squeeze. Trim any excess wire close to the crimp.
- Check tension along the full strand. The beads should sit snugly but not so tight that the wire bows. Loose tension causes beads to slide and bunch.
Pro Tip: Make a test strand of 20–30 beads before committing to a full project. A test strand lets you adjust spacing and tension early, saving significant time and materials on large-scale work.
Large projects like beaded curtains take 16–22 hours depending on design complexity. Knowing that upfront helps you plan your sessions and avoid rushing, which is where most mistakes happen.
What design tips make crystal bead strands look professional?
The gap between an amateur strand and a professional one comes down to pattern planning and finishing technique. Consistency and deliberate pattern planning are what separate the two.
Balance bead sizes for visual rhythm
Alternating large faceted beads with smaller spacer beads creates a visual rhythm that draws the eye along the strand. The rhythm of a bead strand is critical for a professional look. A strand of all same-size beads reads as flat and repetitive. Try a pattern of one 12mm bead, two 6mm beads, and one 8mm bead repeated across the full length. For a 6-foot decorative garland, plan on 100–150 beads depending on bead size to achieve a pleasing density.
Handle crimp beads with care
Over-compressing crimp beads with pliers weakens the wire connection and risks strand failure. A gentle but firm squeeze is all you need. The crimp should hold the wire without cutting into it. If a crimp looks flattened or cracked after squeezing, remove it and use a fresh one.
Hide your knots
Tying knots inside larger bead holes hides them from view and protects them from friction. Apply a pinhead-sized drop of precision glue to the knot before pulling it inside the bead. This prevents slipping and keeps the strand looking clean from every angle.
Pro Tip: Store finished strands by hanging them vertically rather than coiling them in a box. Coiling creates kinks in the wire and puts uneven stress on crimp connections. A hook on the inside of a closet door works perfectly.
Choosing the right finish also matters for longevity. Crystalplace offers faceted bead strands in clear and AB-coated options, so you can match the finish to your lighting environment before you buy.
What mistakes should you avoid in DIY bead strand projects?
Most bead strand failures trace back to a small set of repeatable errors. Recognizing them before you start saves you from rebuilding the same strand twice.
- Using the wrong wire thickness. Wire thicker than 0.5mm makes it hard to thread through small bead holes and puts stress on the bead itself. Wire thinner than 0.3mm snaps under the weight of heavy crystal beads. Stay in the 0.3mm–0.5mm range.
- Skipping the test strand. Jumping straight into a 6-foot curtain without testing your tension and spacing first is the fastest way to waste an afternoon. A 20-bead test costs you five minutes and saves hours.
- Over-tightening the string. A strand strung too tight bows under its own weight and puts constant stress on every crimp and knot. The beads should have just enough room to sit flush without sliding freely.
- Under-tightening the string. Too much slack causes beads to bunch at the bottom of the strand and creates an uneven, drooping look. Check tension at every anchor point.
- Placing knots in exposed positions. Knots sitting between beads wear against the bead edges with every movement. Place knots inside bead holes where possible, and glue them for security.
- Ignoring wire quality. Cheap uncoated wire corrodes over time, especially near windows where humidity fluctuates. Nylon-coated wire resists corrosion and holds its flexibility far longer.
If you find a loose crimp after finishing, do not try to re-squeeze it in place. Cut the strand back to that point, remove the damaged crimp, and replace it with a fresh one. Re-squeezing a loose crimp rarely holds and usually damages the wire further. For a full walkthrough on repairing existing strands, the restringing guide from Crystalplace covers the process in detail.
Understanding wire properties also helps when selecting materials. The sterling silver jewelry guide at USA Jewels covers wire thickness and assembly principles that apply directly to bead strand construction.
Key Takeaways
Successful DIY crystal bead strands require the right wire gauge, deliberate pattern planning, and proper crimp and knot technique to produce strands that look professional and hold up over time.
| Point | Details |
|---|---|
| Wire gauge is critical | Use 0.3mm–0.5mm wire to balance flexibility and strength without cracking beads. |
| Always make a test strand | A short test strand catches tension and spacing problems before they affect the full project. |
| Pattern planning comes first | Lay out your full bead sequence on a mat before threading to avoid mid-project corrections. |
| Crimp beads need a gentle touch | Over-squeezing weakens the wire connection and risks strand failure at the anchor point. |
| Hide and glue your knots | Placing knots inside larger bead holes and gluing them keeps strands neat and extends their life. |
Why patience is the real skill in bead strand crafting
Most crafters underestimate how much of this work is mental. The physical steps are straightforward. The hard part is slowing down when you want to rush.
I have watched people skip the test strand, skip the pattern layout, and skip the wire gauge check, all to save 20 minutes. They end up rebuilding the project from scratch and spending three times as long. The test strand is not optional. It is the single step that separates a finished project from a frustrating one.
Quality materials matter more than most guides admit. A spool of cheap, uncoated wire costs less upfront, but it kinks, corrodes, and snaps. Authentic crystal beads from a reliable source like Crystalplace hold their finish and their edges far longer than low-grade alternatives. The garland assembly guide from Crystalplace is worth reading before you start any large project. It covers details that most general tutorials skip entirely.
The best bead strand projects I have seen came from crafters who treated the planning phase as seriously as the stringing phase. They drew out their pattern, counted their beads, and tested their tension before touching the final wire. That discipline shows in the finished piece every time.
— BCC
Premium crystal beads and strands at Crystalplace
Crystalplace has sourced authentic crystal products directly from trusted manufacturers since 1992. Every bead in their catalog is selected for clarity, finish consistency, and light performance.
For DIY projects that demand real sparkle, the crystal prisms and bead strands at Crystalplace give you the quality foundation this guide describes. Their faceted bead strands come in clear and AB-coated finishes, sized from small spacers to large focal beads. Orders over $22 ship free within the USA. If you want inspiration before you buy, the crystal garland decor ideas blog shows finished projects across a range of styles and room types.
FAQ
What is the best string for crystal bead strands?
Monofilament fishing line and nylon-coated beading wire are the top choices for decorative crystal strands. Both materials resist corrosion and stay nearly invisible behind the beads.
How many beads do I need for a 6-foot garland?
A 6-foot decorative garland typically uses 100–150 beads depending on bead size and spacing. Larger beads reduce the count; smaller spacer beads increase it.
What wire gauge works best for crystal beads?
Wire between 0.3mm and 0.5mm balances flexibility with enough strength to support crystal bead weight. Wire over 1mm is too rigid and risks cracking delicate bead holes.
How do I fix a loose crimp bead?
Cut the strand back to the loose crimp, remove it, and replace it with a fresh one. Re-squeezing a loose crimp rarely holds and often damages the wire further.
Do AB-coated beads look better than clear beads?
AB-coated beads produce a rainbow shimmer in natural light, making them ideal for window hangings and event decor. Clear faceted beads work better for classic chandelier garlands where white light reflection is the goal.
Recommended
- 10 Creative Ways to Use Crystal Beads in Your Projects – CrystalPlace
- Magnificent Crystal Garland Faceted Bead Strand – CrystalPlace
- Understanding Crystal Craftsmanship: An Artisan’s Guide – CrystalPlace
- Why Use Crystal Beads for Your Craft Projects – CrystalPlace