

Discover how to style crystal ornaments for chandeliers with expert tips on choosing the right type, spacing, and lighting for maximum sparkle!
TL;DR:
- Choosing the right crystal type and size enhances the refraction and overall sparkle of chandeliers and ornaments.
- Proper planning of layout, drop lengths, and secure attachment methods ensures a professional, balanced installation.
Style premium crystal ornaments by selecting the right crystal type and size, planning your spacing and drop lengths, then attaching securely and positioning lighting to maximize refraction. Here’s the short version:
- Choose your crystal type and size based on fixture scale and room purpose — authentic Swarovski prisms or Magnificent Crystal Brand pieces from Crystalplace for focal installations, acrylic for high-traffic areas.
- Plan layout and drop lengths before touching a single connector — measure the fixture, map attachment points, and mock up the arrangement on the floor first.
- Attach, balance, and light using closed jump rings or pre-strung loops, then dial in bulb color temperature and angle to pull maximum sparkle from every facet.
Which crystal types and sizes give you the best results?
Real crystal — whether authentic Swarovski or barium lead-free crystal — has a higher refractive index than standard glass, which means sharper prismatic dispersion and more vivid rainbow scatter across walls and ceilings. Acrylic is lighter and safer for high-traffic or outdoor-adjacent spaces, but the sparkle is softer and more diffuse. Optical glass sits between the two: better brilliance than acrylic, less than true crystal.
For chandeliers and hanging installations, teardrop, octagon, and multifaceted prism shapes catch the widest range of light angles. Clear finishes maximize refraction; champagne and amber tints warm the output and suit traditional or transitional rooms. Avoid heavily tinted pieces as your primary crystal — they absorb too much light and reduce overall brightness.
| Room / Fixture Scale | Recommended Crystal Size | Suggested Count Range |
|---|---|---|
| Small pendant (dining nook) | Small teardrops | Moderate number of pieces |
| Medium chandelier (dining room) | Medium octagons or teardrops | Moderate to high number of pieces |
| Large chandelier (foyer, ballroom) | Large multifaceted prisms | Many pieces to create fullness |
| Accent strand / garland | Mixed 1–2 in. beads | Per linear foot of drape |
Pro Tip: Before ordering in bulk, test a single accent crystal or bobeche against your fixture’s metal finish. Plated tones and aged finishes shift perceived crystal color under nearby metals — a champagne crystal reads differently next to antique brass than next to polished chrome.
Crystalplace carries popular ornament types including both Swarovski-authenticated prisms and its own Magnificent Crystal Brand line in clear and color options. Verify the Swarovski authentication mark on any prism sold as genuine — it’s the clearest signal of optical quality.
How to plan spacing, drop lengths, and layout before you start
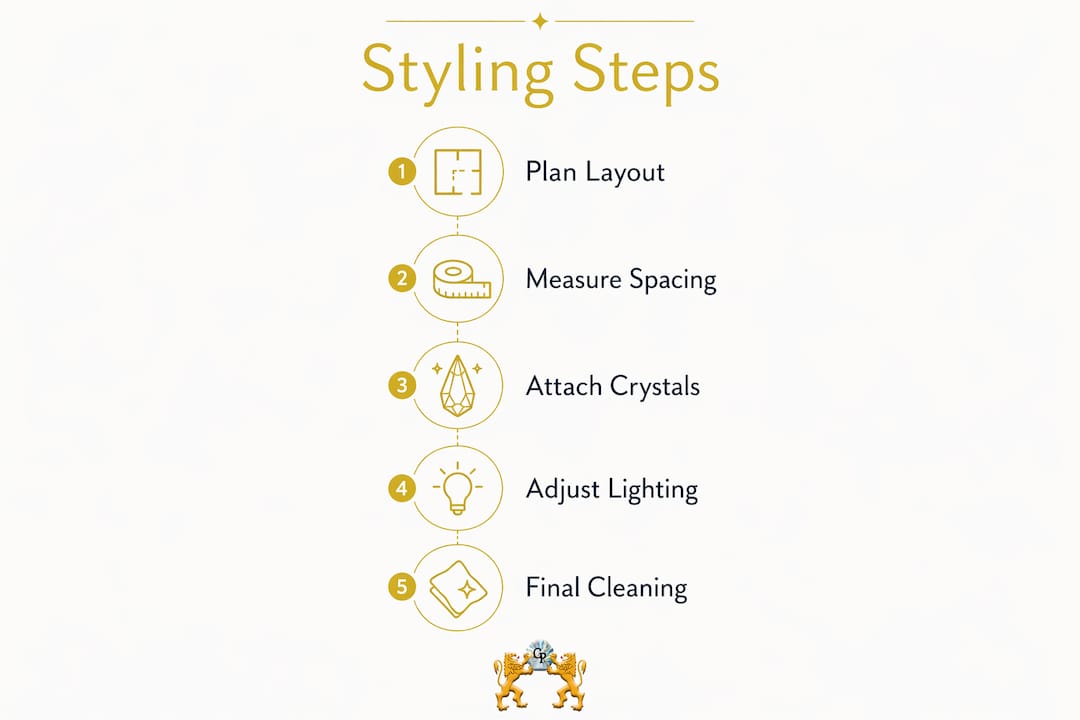
Good installations are planned on paper (or the floor) before anything goes on the fixture. Follow this sequence:
- Measure the fixture frame. Record the diameter of each ring or arm tier, the number of attachment points per tier, and the distance from the canopy to the lowest arm.
- Calculate drop lengths. Subtract the desired clearance from floor to crystal tip from your ceiling height, then subtract fixture body height. The remainder is your maximum drop. For a dining table, the standard clearance is 30–36 inches from tabletop to the lowest crystal.
- Map attachment points in a grid. For multi-tier chandeliers, use a matrix: assign crystal type and drop length to each ring/arm position. This prevents imbalance and cuts iterative rework on the ladder.
- Decide symmetry vs. accent placement. Uniform drops read as formal and traditional. Graduated drops (shorter at the top tier, longer at the bottom) add visual depth. Deliberate asymmetric clusters work in modern and eclectic rooms but require a planned focal point.
- Mock up on the floor. Lay the fixture diagram flat, place crystals at their planned positions, and photograph it. You’ll catch spacing problems before climbing a ladder.
Pro Tip: Use a soft measuring tape for curved frame sections and calipers for hole diameters. Knowing the exact hole size before ordering connectors saves a return trip.
How to attach crystal ornaments securely and cleanly
Closed jump rings and concealed wire ends are what separate a professional-looking installation from a DIY one. The hardware is small, but every open loop or visible twist is a detail that catches the eye — and not in the way you want.
Jump rings are the standard connector for individual pendants. Open the ring with a side-to-side twist using two pairs of needle-nose pliers, thread the crystal loop and the fixture attachment point, then close fully with the same motion. Never pull the ring apart end-to-end — that distorts the circle and weakens the closure.
For strands and garlands, attach one end first, drape with slight slack (not taut), then secure the other end and adjust for visual balance. A taut garland pulls connectors and can stress the frame over time.
Safety checklist before you start:
- Power off at the breaker, not just the wall switch.
- Use a stable ladder or scaffold rated for your weight plus tools.
- Verify the fixture’s rated load before adding crystal weight.
- Never exceed the arm’s load-bearing capacity — distribute weight evenly across all attachment points.
Pro Tip: Tuck wire ends and excess connector length behind bobeches or into the frame channel. When a connector is intentionally visible — as in an industrial or modern design — use polished brass or black-finish rings that match the fixture’s metal tone.

What lighting setup actually makes crystals sparkle?
Bulb choice matters as much as crystal quality. LED bulbs run cooler than incandescent, reduce heat stress on both crystals and plated finishes, and let you select color temperature precisely.
- 2700K–3000K (warm white): Best for traditional and transitional rooms; adds warmth to clear crystal and makes champagne or amber tints glow.
- 3500K–4000K (neutral to cool white): Maximizes prismatic dispersion in clear crystal; ideal for foyers and dining rooms where rainbow scatter is the design goal.
- Avoid 5000K+ daylight bulbs on most residential fixtures — the blue-white output flattens the warm facets and can make the room feel clinical.
Fixture height and bulb placement shape where light hits. In a dining room, hang the chandelier so bulbs sit at roughly eye level when seated — around 60–66 inches from the floor — so light enters crystals from a slight upward angle and scatters across the ceiling. In a foyer with a two-story ceiling, position the fixture so the lowest crystal clears the door arc and bulbs face outward, not straight down, to scatter light across the walls. For a bedroom, a lower-wattage warm-white LED reduces glare while still activating the crystals’ facets.
Avoid placing the fixture directly against a dark ceiling with no reflective surface nearby. Crystals need a light-colored surface to scatter onto — a white or cream ceiling amplifies the effect dramatically. You can see how this plays out in real fixture configurations like the Crystorama Alston chandelier, where bulb placement and crystal density work together.
Safe cleaning steps and what to avoid
Start with power off at the breaker. Put on cotton gloves — skin oils transfer to crystal surfaces and attract dust faster. Then choose your method:
| Method | Best For | Avoid |
|---|---|---|
| Brilliante spray (in-place) | Lightly soiled crystals, plated frames | Ammonia-based cleaners, abrasive cloths |
| Warm water + mild soap (removed) | Heavily soiled or removable pieces | Dishwasher, ultrasonic cleaners |
| Microfiber dry wipe | Dust between deep cleans | Paper towels (scratch risk) |
Brilliante is the recommended commercial cleaner for chandeliers — it’s formulated to clean crystal without stripping plated finishes. For a full clean, remove crystals where possible, rinse gently, and air dry on a microfiber cloth. Never rub while wet.
Pro Tip: Inspect crystals every 6 months and keep a labeled set of spare matching pieces on hand. A single missing or cracked pendant on a symmetrical fixture is immediately visible — having the right replacement in stock means a 10-minute fix instead of a delayed order.
Weight limits, preservation, and when to call a pro
Adding crystals increases fixture weight. A rough calculation: multiply the per-piece weight (in ounces) by total count, then add the base fixture weight. Most residential ceiling boxes are rated for 35–50 lbs; confirm your box rating before exceeding half that with a loaded chandelier.
- Check the ceiling box rating before installation — it’s printed on the box or in the fixture’s documentation.
- Distribute weight evenly across all arms; avoid clustering heavy prisms on one side.
- Control humidity in rooms with colored or plated crystals. High humidity accelerates tarnish on metal finishes and can cloud some crystal coatings over time.
- Use only soft cloths on plated arms — abrasive materials scratch the finish and change how nearby crystals read in color.
- Call a licensed electrician if the ceiling box needs upgrading, if wiring shows any wear, or if the fixture exceeds 35 lbs and you’re unsure of the box rating. Structural and electrical concerns are not DIY territory.
Styling ideas by room, decor style, and occasion
A single tinted crystal accent in a cluster of clear prisms does more for a room’s mood than a full fixture swap. Restraint with color is what keeps crystal decor looking intentional rather than busy.
By room and style:
- Modern rooms: Stick to clear octagons and geometric prisms on fixtures with matte black or brushed nickel frames. Minimal counts, maximum spacing.
- Traditional rooms: Layer teardrops and pendeloques in graduated drops; mix clear and champagne for warmth. Garland strands between arms add density without adding individual connectors.
- Transitional rooms: Combine a clean-lined fixture with a mix of clear and one subtle tint — rose or light amber — clustered at the lowest tier only.
For occasions and seasonal swaps: Temporary garlands are the easiest reversible change. Drape them loosely over existing arms for a holiday or event look, then remove without disturbing the permanent crystals. Store seasonal pieces in labeled compartments by size and hole diameter for fast reinstallation.
Pro Tip: For room-by-room styling ideas with photo examples, Crystalplace’s decor blog covers modern, classic, and transitional configurations in detail.
Your shopping checklist before you order
Work through this before placing any order:
- Confirm hole diameter and loop dimensions on your fixture’s attachment points — measure with calipers, not by eye.
- Verify the Swarovski authentication mark on any prism sold as genuine Swarovski.
- Order spare crystals equal to at least 5–10% of your total count, labeled by size and hole diameter.
- Check connector compatibility: jump ring gauge should match crystal hole diameter without play.
| Item | Purpose | Verification Tip | Qty Guidance |
|---|---|---|---|
| Crystal prisms (Swarovski or Magnificent Crystal Brand) | Primary sparkle elements | Check authentication mark | Per fixture plan + 5–10% spare |
| Jump rings / pre-strung loops | Secure attachment | Match gauge to hole diameter | 1–2 per crystal + extras |
| Bobeches | Frame and conceal connectors | Match finish to fixture metal | Per candle cup |
| Crystal garland | Drape and strand accents | Confirm bead hole size | Per linear foot of drape |
| Brilliante cleaner | Ongoing maintenance | Check formulation for plated finishes | 1 bottle per fixture |
Crystalplace offers tiered volume discounts (Buy 2, 6, or 12) on most crystal lines, and free US shipping on orders over $22. For large multi-arm fixtures, ordering in one batch at the right tier saves meaningfully on per-unit cost.
How to remove and reinstall crystals for cleaning or redecorating
Temporary removal follows the reverse of installation — but a few details prevent damage and lost pieces.
Label each crystal’s position before removal. A simple grid sketch (Tier 1, Position 3, for example) lets you reinstall without guessing. For large fixtures, photograph the full installation from multiple angles first.
Remove crystals by reversing the jump ring technique: open side-to-side, never end-to-end. Place removed pieces in a divided tray or egg carton, grouped by size and position. Clean each piece individually per the method in the cleaning section above, then dry fully before reinstalling — moisture trapped in a closed jump ring can accelerate tarnish on the connector.
For redecorating swaps, store crystals in labeled zip-lock bags with a small card noting size, hole diameter, and original fixture. This makes future reinstallation or replacement ordering straightforward. How-to hang resources from Crystalplace cover reinstallation sequences and replacement part sourcing in detail.
Key Takeaways
Styling crystal ornaments for premium chandeliers comes down to matching crystal quality to fixture scale, planning every drop length before attachment, and maintaining the installation with the right cleaner and regular inspection.
| Match crystal to fixture scale | Use small teardrops for small pendants; large multifaceted prisms for large foyer fixtures. Refer to the size and shape table above for guidance based on your fixture and room. | Plan before you climb | Mock up the full arrangement on the floor and photograph it before attaching anything to the fixture. | | Close every jump ring fully | Side-to-side twist only; an open loop loosens under vibration and drops crystals. | | Use LEDs at 2700K–4000K | Warm white for traditional rooms; neutral to cool white for maximum prismatic scatter in foyers. | | Clean with Brilliante, inspect every 6 months | Keep 5–10% spare crystals on hand, labeled by size and hole diameter, for fast replacement. | | Shop at Crystalplace | Authentic Swarovski prisms, Magnificent Crystal Brand, and Brilliante cleaner with tiered volume discounts and free US shipping over $22. |
What most installers get wrong about crystal styling
The conventional advice is to focus on the crystals themselves — pick the best quality, hang them evenly, and the result will be beautiful. That’s true as far as it goes, but it misses the variable that actually controls the outcome: the relationship between bulb placement and crystal position.
A flawless Swarovski prism hung in the wrong spot relative to the bulb produces almost no prismatic scatter. The same prism, repositioned so light enters at the correct angle for its facet geometry, throws rainbows across an entire ceiling. Most installers spend their planning time on symmetry and drop length — both matter — but skip the step of checking where each crystal sits relative to the nearest light source.
The second thing people underestimate is hardware finish. Mixing connector metals on a single fixture (brass jump rings on a chrome frame, for example) creates a visual noise that reads as unfinished, even when every crystal is perfectly placed. Spend the extra few minutes sourcing connectors that match the fixture’s finish. It’s the detail that makes an installation look like it was done by someone who has done this before.
Get your crystals and care products from Crystalplace
Crystalplace has been supplying premium crystal components from California since 1992, and the depth of assortment is what sets it apart for professional and consumer orders alike. You get authentic Swarovski prisms with authentication, the full Magnificent Crystal Brand line in clear and color, every connector and bobeche you need to finish the job cleanly, and Brilliante cleaner to keep the installation looking sharp long-term.
Volume discounts are tiered at Buy 2, 6, and 12, so larger fixture orders cost less per piece. Free US shipping kicks in at $22 — low enough that most single-fixture orders qualify. Whether you’re restoring a vintage chandelier or outfitting a new installation, shop the full crystal collection at Crystalplace to order everything in one place.
Recommended
- Crystal Ornaments That Add Lasting Sparkle – CrystalPlace
- How to Hang Crystal Ornaments With Lasting Sparkle – CrystalPlace
- Crystal Garlands That Transform a Chandelier – CrystalPlace
- Hanging Crystals for Chandeliers: Elevate Decor 2025 – CrystalPlace