
Follow this chandelier cleaning checklist to safely restore crystal sparkle. Learn proper techniques, safety protocols, and maintenance schedules for lasting brilliance.
Cleaning a crystal chandelier without a clear plan often leads to damaged crystals, safety hazards, or disappointing results. A proven checklist approach transforms this intimidating task into a manageable routine that preserves your fixture’s brilliance and longevity. This guide walks you through selection criteria, safety protocols, crystal-specific techniques, and maintenance schedules to keep your chandelier stunning year-round.
Key takeaways
| Point | Details |
|---|---|
| Safety first | Turn off power at the breaker and wear protective gloves before starting any cleaning. |
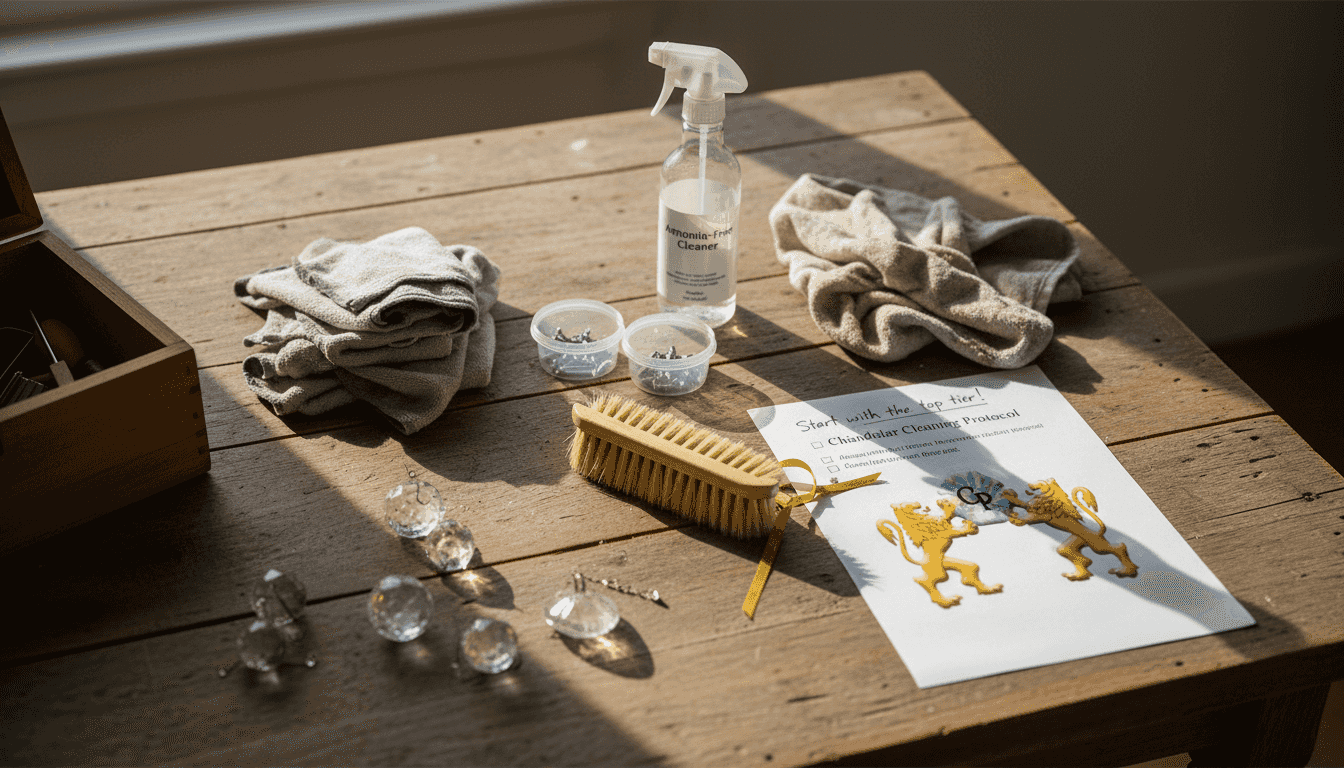
| Use crystal-safe solutions | Apply ammonia-free, pH-neutral cleaners and microfiber cloths to protect crystal surfaces. |
| Remove and label crystals | Take down crystals individually and label them to ensure proper reassembly. |
| Inspect and repair carefully | Use authentic Swarovski or lead crystal parts to maintain fixture integrity and sparkle. |
| Follow a maintenance schedule | Clean every 3 to 6 months and schedule annual professional inspections. |
Selection criteria for effective chandelier cleaning
Choosing the right cleaning method protects your investment while restoring your chandelier’s sparkle. Safety protocols form the foundation of any successful cleaning session. Always disconnect power at the circuit breaker, not just the light switch, to eliminate electrical risks. Wear glass handling gloves to prevent cuts and provide better grip on slippery crystals.
Cleaning solutions matter significantly. Ammonia-free, pH-neutral cleaning solutions preserve crystal surface clarity without etching or dulling the finish. Many commercial glass cleaners contain harsh chemicals that damage delicate crystal over time. The best cleaner for chandeliers combines gentle surfactants with neutral pH levels to lift grime without residue.
Tool selection impacts results too. Microfiber cloths trap dust particles without scratching, while natural bristle brushes reach tight spaces between crystal strands. Avoid paper towels or abrasive sponges that leave lint or micro-scratches. Cotton gloves prevent fingerprints on freshly cleaned crystals.
Cleaning frequency depends on your environment. Kitchens accumulate grease faster than dining rooms. Homes near busy roads collect more dust. Regular cleaning prevents buildup that becomes difficult to remove later.
Pro Tip: Photograph your chandelier before removing any crystals. These reference images make reassembly foolproof and help identify missing pieces.
Scheduling matters for crystal preservation. Quarterly cleaning keeps most chandeliers sparkling without excessive handling. High-traffic areas may need monthly attention. Document your cleaning dates to establish a consistent rhythm that prevents neglect.
Safety checklist before cleaning your chandelier
Electrical safety protects you from serious injury. Turning off power at the circuit breaker eliminates shock risk completely, while flipping a light switch may still leave live wires. Use a voltage tester to confirm power is truly off before touching any fixture components. Label the breaker box to prevent someone from accidentally restoring power mid-cleaning.
Follow these safety steps in order:
- Locate and switch off the correct breaker for your chandelier circuit.
- Test the fixture with a voltage tester to verify power is disconnected.
- Clear the area beneath the chandelier of furniture, rugs, and breakable items.
- Set up a stable ladder with non-slip feet on level ground.
- Wear specialized glass handling gloves that reduce cut risk by 85%.
- Place drop cloths or towels below to cushion any crystals that slip.
Ladder safety prevents falls that cause more injuries than electrical accidents. Choose a ladder tall enough to work comfortably without overreaching. Position it on firm, level flooring, never on rugs or unstable surfaces. Have a helper steady the base while you work above.
Pro Tip: Keep a small container on your ladder shelf to hold removed crystals and fasteners. This prevents frustrating searches for tiny pieces that roll away.
Protective gear extends beyond gloves. Safety glasses shield your eyes from falling dust and cleaning spray. Long sleeves protect arms from sharp crystal edges. Remove jewelry that might snag on delicate chains or scratch crystal surfaces. These cleaning crystal chandeliers safely practices create a secure environment for detailed work.
Crystal-specific cleaning checklist
Removing and individually cleaning crystal prisms in warm, soapy water followed by air drying prevents damage and improves results. This methodical approach ensures thorough cleaning without overwhelming you or risking mix-ups during reassembly.
Follow this sequence for optimal results:
- Remove one crystal strand or section at a time.
- Label each section with numbered tags or take photos for reference.
- Prepare a basin of lukewarm water with mild, pH-neutral dish soap.
- Submerge crystals briefly and gently agitate to loosen grime.
- Rinse thoroughly under clean running water to remove all soap residue.
- Place crystals on a lint-free towel and let them air dry completely.
- Never wipe wet crystals, as this creates streaks and scratches.
Mild detergent solutions work better than specialized products for most cleaning jobs. Mix one tablespoon of gentle dish soap per gallon of warm water. Avoid hot water that might crack crystals or loosen adhesive bonds. Skip vinegar, ammonia, or lemon-based cleaners that etch crystal surfaces over time.
Handling technique matters as much as cleaning solution. Hold crystals by their connector pins or loops, not by delicate points that might snap. Support larger prisms with both hands. Work over a padded surface to cushion accidental drops.
For stubborn buildup, these techniques help:
- Soak extra-dirty crystals for 10 minutes before gentle scrubbing
- Use a soft toothbrush to clean intricate cuts and facets
- Rinse multiple times to ensure no soap film remains
- Pat bases gently with microfiber if water spots form during drying
The safe crystal chandelier cleaning method emphasizes patience over speed. Rushing increases breakage risk and leaves residue. Complete drying prevents water spots that dull sparkle. This investment of time yields professional-quality results without professional costs.
Reinstallation requires the same care as removal. Match each crystal to its original position using your photos or labels. Check that connector loops close securely and hang evenly. Test the fixture’s balance before restoring power.
Tools and materials checklist for chandelier maintenance
Proper equipment transforms chandelier cleaning from frustrating to straightforward. Microfiber cloths effectively remove dust without scratching delicate crystal or metal components, making them essential for both light dusting and detailed cleaning sessions.
Gather these essential items before starting:
- Multiple microfiber cloths in various sizes for different tasks
- Natural bristle feather duster for weekly maintenance dusting
- Mild dish soap free from dyes, fragrances, and harsh surfactants
- Two basins or large bowls for washing and rinsing crystals
- Glass handling gloves with textured grip surfaces
- Lint-free towels for drying surfaces and cushioning work areas
- Needle-nose pliers for adjusting or replacing connector pins
- Voltage tester to verify electrical safety before starting
- Stable step ladder rated for your weight plus tools
Quality tools pay for themselves through reduced crystal breakage and faster cleaning times. Invest in commercial-grade microfiber cloths that withstand hundreds of washings without losing effectiveness.
Specialized efficient chandelier cleaning tools include extendable dusters for high fixtures and spray bottles with fine mist settings. Avoid tools with rough edges, metal bristles, or abrasive surfaces. Natural materials like cotton and lambswool work best for delicate crystal work.
Cleaning solution alternatives include crystal-specific formulas, though basic dish soap performs equally well at lower cost. Commercial chandelier cleaners offer convenience but check ingredient lists for ammonia or acidic compounds. Choosing crystal-friendly cleaners protects your investment while achieving brilliant results.
Organization tools prevent chaos during complex cleaning projects. Small plastic containers hold removed screws and pins. Muffin tins work perfectly for sorting crystals by size or position. Label everything clearly to avoid reassembly confusion hours later.
Repair and inspection checklist for crystal chandeliers
Inspecting your chandelier before cleaning reveals damage that cleaning might worsen. Look for loose crystals, bent connector pins, corroded metal parts, and chipped edges. Early detection prevents small issues from becoming expensive repairs.
Check these common problem areas:
- Crystal attachment points for weakened or stretched connector loops
- Individual prisms for chips, cracks, or cloudy areas indicating age
- Metal framework for corrosion, loose joints, or bent arms
- Electrical components for frayed wires or damaged sockets
- Balance and stability when gently moving the fixture
Matching replacement crystals requires attention to detail. Measure crystal length, width, and thickness precisely. Note the connector type: octagon, pin, or clip. Count facets and observe cut patterns. Generic replacements rarely match authentic crystal quality or appearance.
Using authentic Swarovski or lead crystal parts extends repair longevity by about 30% compared to imitations. Genuine crystals maintain their clarity and brilliance decades longer. The initial cost difference pays off through superior performance and fewer future replacements.
| Repair Type | Authentic Crystal | Generic Replacement |
|---|---|---|
| Clarity retention | Excellent over 20+ years | Dulls within 5-7 years |
| Light refraction | Maximum sparkle and rainbow effects | Reduced brilliance and color |
| Durability | Chip-resistant, stable connectors | Prone to breakage, loose fittings |
| Cost | Higher initial investment | Lower upfront, frequent replacement |
| Matching | Perfect color and cut consistency | Noticeable variations in appearance |
Create a safe repair workspace with ample lighting and padded surfaces. Lay out replacement crystals in order before starting. Use needle-nose pliers to open and close connector loops without stressing the crystal. Test each replacement’s security before moving to the next piece.
Document repairs with dated photos and notes. Track which crystals you replaced and where you sourced them. This history helps with future maintenance and ensures consistent quality across repairs. Repairing chandelier crystals becomes simpler with organized records.
Maintenance schedule checklist for lasting chandelier brilliance
Cleaning every 3 to 6 months prevents dust buildup that dulls sparkle and requires aggressive cleaning later. Consistent maintenance protects your chandelier better than sporadic deep cleans that stress delicate components.
Tailor your schedule to your environment:
- Kitchen chandeliers need monthly attention due to grease and cooking vapors
- Dining room fixtures thrive with quarterly cleaning sessions
- Bedroom or guest room chandeliers may only need biannual deep cleaning
- Entryway fixtures in dusty climates benefit from monthly quick dusts
- High-humidity bathrooms require more frequent inspections for corrosion
Weekly light dusting between deep cleans maintains sparkle with minimal effort. Pass a feather duster gently over crystals without applying pressure. This two-minute task prevents buildup that bonds to crystal surfaces. Quick maintenance extends the time between full disassembly cleanings.
Annual professional inspections catch electrical and structural issues before they become dangerous. Certified technicians spot loose wiring, failing sockets, and weakened support chains that homeowners might miss. Professional eyes provide peace of mind and prevent costly emergency repairs.
Track your maintenance in a simple log. Note cleaning dates, repairs made, and crystals replaced. This record reveals patterns and helps predict future needs. You’ll notice which sections accumulate grime faster or which crystals need frequent tightening.
Seasonal preparation matters for homes that host gatherings. Clean your chandelier two weeks before major holidays or events. This timing allows any issues to surface with time to address them. Your fixture will sparkle for guests without last-minute stress.
The chandelier cleaning schedule you establish today protects your investment for decades. Consistency beats intensity in chandelier care. Regular attention preserves beauty and prevents the damage that comes from neglect.
Summary comparison table and situational recommendations
Different approaches suit different situations and skill levels. DIY cleaning saves money but demands careful technique and time investment. Professional services offer expertise and insurance coverage but cost significantly more per session.
| Approach | Cost | Time Required | Damage Risk | Best For |
|---|---|---|---|---|
| DIY basic cleaning | $10-$30 in supplies | 2-4 hours | Low with proper technique | Budget-conscious homeowners, simple fixtures |
| DIY deep cleaning | $30-$60 in supplies | 4-8 hours | Medium without experience | Confident DIYers, standard chandeliers |
| Professional cleaning | $150-$400 per session | 2-3 hours (minimal homeowner time) | Very low | Complex fixtures, high ceilings, valuable antiques |
| Hybrid approach | $50-$150 | Varies | Low | Routine DIY with annual professional inspection |
Cleaning solution choices impact both immediate results and long-term crystal health:
- pH-neutral solutions preserve crystal clarity indefinitely
- Ammonia-based cleaners create micro-etching that accumulates over years
- Vinegar solutions work short-term but gradually dull surfaces
- Commercial crystal cleaners offer convenience at premium prices
- Basic dish soap provides excellent results at minimal cost
Authentic replacement parts consistently outperform generic alternatives in durability and appearance. Cheap substitutes may save $5-$10 per crystal but require replacement three times as often. Calculate total cost over ten years to see authentic crystal’s true value.
Tailored strategies for specific situations:
- Vintage chandeliers: Use extra-gentle handling and consult restoration experts before aggressive cleaning
- Kitchen fixtures: Increase cleaning frequency to monthly and use degreasers for metal parts
- First-time DIY cleaners: Start with simpler fixtures, watch tutorial videos, and work slowly
- Tall ceilings: Consider professional help or invest in proper scaffolding for safe access
- Antique crystals: Research historical cleaning methods and avoid modern chemical cleaners
The complete chandelier cleaning checklist approach adapts to your specific needs, budget, and confidence level. Start conservatively and build skills through experience. Most homeowners successfully clean their chandeliers once they understand proper techniques and safety protocols.
Enhance your chandelier care with CrystalPlace products
Maintaining your chandelier’s brilliance requires quality materials and authentic replacement parts. CrystalPlace specializes in genuine Swarovski and lead crystal prisms for chandeliers, offering the exact matches your fixture needs for flawless repairs. Our extensive inventory includes every connector type, cut pattern, and size to restore your chandelier to original glory.

Explore our collection of decorative crystal suncatcher ornaments that complement your chandelier’s sparkle while adding rainbow light effects throughout your space. We also stock crystal-safe cleaning solutions, specialized tools, and safety equipment designed specifically for chandelier maintenance. Since 1991, we’ve helped homeowners preserve their lighting investments with expert guidance and premium products. Free shipping on orders over $22 makes professional-quality care accessible and affordable.
How often should I clean my crystal chandelier to keep it sparkling?
Clean your chandelier every 3 to 6 months depending on environmental factors like kitchen grease, dust levels, and humidity. High-traffic areas and kitchens need monthly attention, while bedroom fixtures may only require biannual deep cleaning. Weekly light dusting between full cleanings maintains sparkle with minimal effort. Schedule annual professional inspections to detect structural issues early and ensure electrical safety. Document your cleaning dates to establish a consistent maintenance rhythm that prevents buildup. Following a regular cleaning schedule protects your investment and keeps crystals brilliant for decades.
What cleaning solutions are safest for crystal chandeliers?
Ammonia-free, pH-neutral solutions or mild dish soap mixed with warm water are safest for crystal surfaces. These gentle formulas lift dirt without etching or dulling the crystal’s surface. Avoid harsh chemicals, vinegar, lemon-based cleaners, and commercial glass cleaners containing ammonia that gradually damage crystal clarity. The safest chandelier cleaners combine effective cleaning with long-term crystal preservation.
How do I safely replace a damaged crystal on my chandelier?
Match the crystal shape, size, and connector type carefully before installation to avoid uneven hanging and aesthetic flaws. Measure dimensions precisely and photograph the original crystal from multiple angles for reference. Use authentic Swarovski or lead crystal replacement parts for durability and sparkle that matches your existing crystals. Work over a padded surface, use needle-nose pliers for connector adjustments, and test security after installation. Following proper techniques to replace damaged chandelier crystals ensures lasting repairs and maintains your fixture’s beauty.
Is it better to hire a professional for chandelier cleaning or do it myself?
DIY cleaning saves $150-$400 per session but requires strict adherence to safety protocols and correct techniques. You’ll need 2-8 hours depending on fixture complexity and your experience level. Professionals offer deeper cleaning, reduced damage risk, and insurance coverage but cost significantly more. Most homeowners successfully clean standard chandeliers themselves after learning proper methods. Consider the hybrid approach: routine DIY maintenance with annual professional inspections for electrical and structural safety. Review professional vs DIY chandelier cleaning comparisons to determine what fits your situation, budget, and confidence level best.
Recommended
- 7 Steps to a Complete Crystal Chandelier Checklist – CrystalPlace
- Crystal Chandelier Maintenance 2026: 65% Retain Shine – CrystalPlace
- Clean a Crystal Chandelier Safely, No Stress – CrystalPlace
- Step-by-Step Guide to Cleaning Crystal Chandeliers – CrystalPlace