
Learn how to replace chandelier parts safely with this complete 2026 DIY guide. Step-by-step instructions for restoring brilliance to your lighting fixture.
Chandeliers lose their sparkle over time as crystals chip, pins corrode, and parts go missing. What once illuminated your space with elegance now looks dull and incomplete. Replacing worn or damaged chandelier parts restores brilliance and transforms your fixture back into a stunning centerpiece. This guide walks you through assessing your chandelier’s condition, gathering the right tools, and executing safe, effective replacements. Whether you’re dealing with missing crystals or outdated hardware, you’ll learn practical steps to revitalize your lighting with confidence.
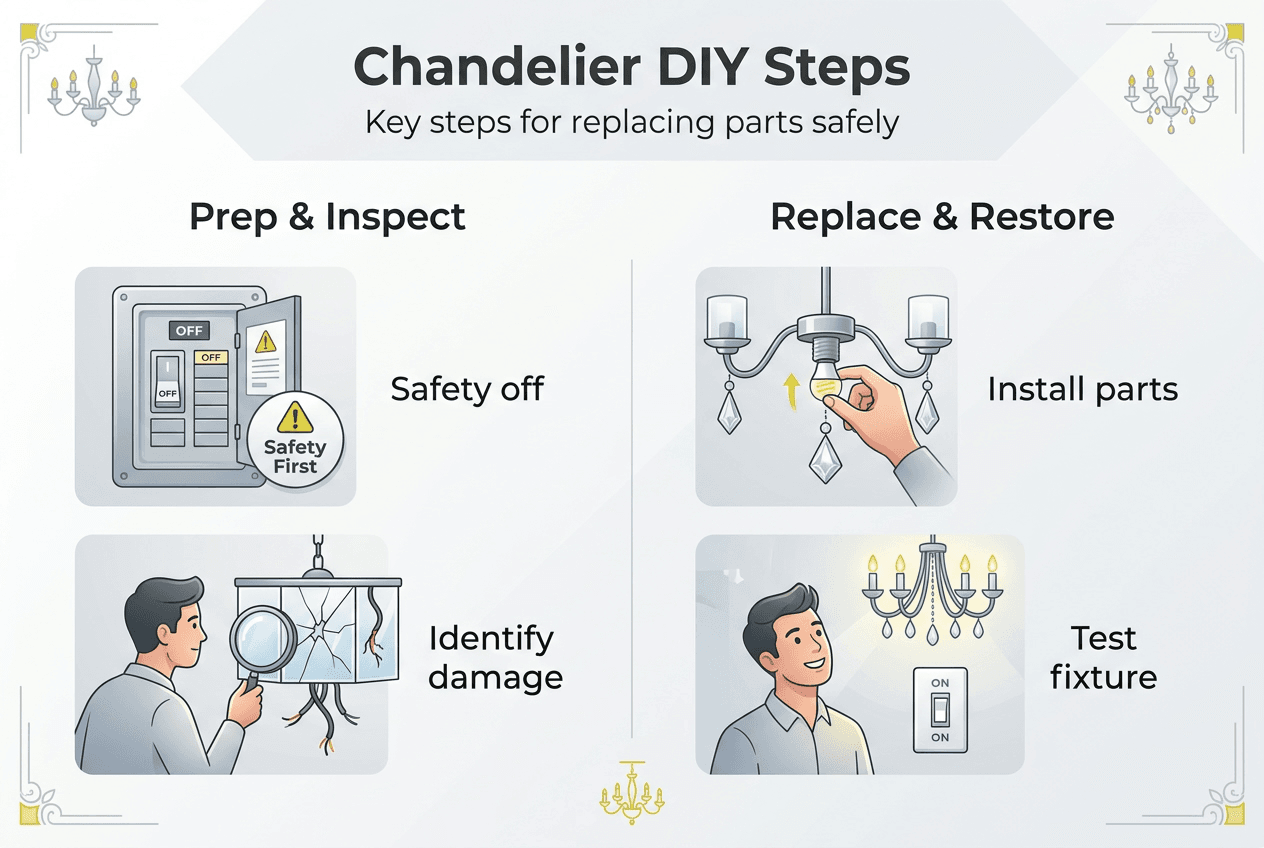
Key takeaways
| Point | Details |
|---|---|
| Assess before starting | Understand your chandelier’s style and condition before starting any refurbishment work to match replacement parts correctly. |
| Prioritize safety | Always turn off power at the breaker and verify with a voltage tester before touching any electrical components. |
| Match parts precisely | Carefully examine and measure one of the remaining crystals to determine replacement needs and ensure visual harmony. |
| Use quality materials | Choose authentic crystal prisms and durable metal components to maintain sparkle and longevity. |
| Maintain regularly | Establish a cleaning schedule based on your chandelier’s location to preserve brilliance and prevent buildup. |
Understanding your chandelier and preparing for replacement
Before you start unscrewing anything, take time to understand what you’re working with. Chandeliers come in various styles like traditional crystal, modern geometric, or vintage brass designs. Each type uses specific parts that must match during replacement. Identifying your chandelier’s style helps you source compatible crystals, pins, and hardware.
Inspect your fixture carefully. Note any missing or damaged crystals, bent pins, corroded sockets, or frayed wiring. Count how many parts need replacement and check if existing crystals show cracks or cloudiness. This inventory prevents multiple trips to the store and ensures you order everything at once.

Measuring matters more than you think. Use a ruler or calipers to record crystal length, width, and hole diameter. Check the examples of chandelier crystals to see common shapes like pendalogues, octagons, or teardrops. Write down pin lengths and diameters, socket sizes, and any decorative element dimensions. Accurate measurements guarantee your replacement crystals fit perfectly without modification.
Understand the materials used in your original fixture. Brass frames resist corrosion better than cheaper metals. Authentic crystal refracts light far better than acrylic or glass. Knowing what you have helps you choose compatible replacements that maintain or improve quality. If your chandelier features antique brass finish, selecting modern chrome pins creates visual discord.
Gather your tools before climbing the ladder. You’ll need screwdrivers in multiple sizes, needle-nose pliers, a non-contact voltage tester, soft microfiber cloths, and a stable step stool or ladder. Create a clean workspace below the chandelier with towels or soft blankets to catch any falling parts. Good lighting in your work area prevents eyestrain and helps you see small components clearly.
| Chandelier Style | Typical Parts Needing Replacement | Key Considerations |
|---|---|---|
| Traditional crystal | Prisms, pins, bobeches | Match crystal cut and finish |
| Modern geometric | Glass panels, metal frames | Ensure exact dimensions |
| Vintage brass | Sockets, wiring, candle covers | Verify electrical compatibility |
| Candelabra style | Candle sleeves, drip pans | Match metal finish |
Pro Tip: Label each section of your chandelier with masking tape and a marker during disassembly. Write “Tier 1 East” or “Arm 3” so you know exactly where each crystal and pin belongs during reassembly.
Tools, materials, and safety measures for chandelier refurbishment
The right tools make replacement work faster and safer. Start with a complete screwdriver set including flathead and Phillips in various sizes. Add needle-nose pliers for gripping small pins and wire cutters if you’re replacing electrical components. A non-contact voltage tester is essential for confirming power is off. Include soft cotton gloves to prevent fingerprints on clean crystals and protect your hands from sharp edges.
Quality replacement parts determine how long your restoration lasts. Authentic crystal prisms from reputable suppliers refract light beautifully and resist yellowing. Brass or stainless steel pins won’t corrode like cheaper alternatives. Metal sockets must handle heat from bulbs without warping. Investing in quality components now prevents repeat repairs later.
Safety cannot be negotiable when working with electrical fixtures. Turn off power at the breaker before touching any part of your chandelier, not just the wall switch. Use your voltage tester to verify power is truly off by touching it to the fixture’s wiring. Work from a stable ladder with someone nearby to hand you tools and steady the ladder. Never rush this process.
Set up your workspace thoughtfully. Spread soft blankets or towels on the floor directly under the chandelier to cushion any accidentally dropped crystals. Position your ladder on level ground and lock it in place. Have a container ready for removed screws, pins, and small parts so nothing rolls away. Good overhead lighting helps you see details clearly without straining.
Follow these numbered safety steps every time:
- Switch off the circuit breaker controlling your chandelier and tape it in the off position.
- Test the fixture with a voltage tester to confirm no electrical current flows.
- Position your ladder securely and have someone spot you during the entire process.
- Wear cotton gloves to protect crystals from oils and your hands from sharp edges.
- Keep a parts container within easy reach to prevent losing small components.
- Work slowly and methodically, never forcing stuck parts that might break.
Consider these essential supplies:
- Non-contact voltage tester for electrical safety verification
- Multiple screwdriver sizes for various fixture screws
- Needle-nose pliers for pin removal and installation
- Soft microfiber cloths for cleaning without scratching
- Cotton gloves to prevent fingerprints on crystals
- Stable ladder rated for your weight plus tools
- Small containers for organizing removed hardware
- Camera or phone for photographing assembly before disassembly
Pro Tip: Choose antique brass finish pins when restoring vintage chandeliers to maintain period authenticity and ensure seamless visual integration with aged crystals.
Review your chandelier cleaning checklist and gather appropriate cleaning solutions before starting work. Cleaning crystals during replacement maximizes their sparkle once reinstalled.
Step-by-step process to replace chandelier parts and restore brilliance
Now you’re ready to execute the actual replacement. Start by photographing your chandelier from multiple angles before touching anything. These reference photos prove invaluable during reassembly when you can’t remember which crystal hung where. Take close-ups of pin placements, wire connections, and crystal arrangements.
Begin disassembly systematically. Work from bottom to top, removing crystals tier by tier. Gently unhook or unscrew each crystal, placing them in labeled containers matching your earlier tape labels. Inspect pins as you remove them, noting any bent, corroded, or missing pieces. Follow a step-by-step cleaning process to restore shine and remove grime from each crystal before reinstallation.
Clean crystals using methods appropriate for their material. Mix warm water with a few drops of mild dish soap for most crystal types. Dip each piece briefly, swirl gently, then rinse with clean water and dry immediately with a lint-free cloth. Avoid ammonia-based cleaners that can cloud certain crystal finishes. For stubborn grime, use specialized crystal cleaning solutions designed for delicate surfaces. Check the safe crystal chandelier cleaning guide for detailed techniques.
Replacing chandelier crystals is generally straightforward once you match sizes correctly. Thread new pins through crystal holes, ensuring they fit snugly without forcing. Attach crystals to their designated positions on the frame, working from top to bottom this time. Match crystal shapes and sizes to their original locations using your reference photos. Double-check that each piece hangs straight and secure.
Reassemble methodically, reversing your disassembly sequence. Start with the top tier and work downward, installing each crystal and checking stability before moving to the next. Tighten screws firmly but not so tight they crack delicate components. Test each arm or section for wobble before proceeding. This systematic approach prevents having to redo work when you discover loose parts later.
| Replacement Task | Difficulty Level | Estimated Time | Key Consideration |
|---|---|---|---|
| Crystal prism swap | Easy | 1 to 2 hours | Match size and hole diameter |
| Pin replacement | Easy | 30 minutes to 1 hour | Verify finish matches frame |
| Socket replacement | Moderate | 2 to 3 hours | Requires electrical knowledge |
| Full rewiring | Advanced | 4 to 6 hours | Consider professional help |
Avoid these common mistakes:
- Mixing crystal sizes from different tiers creates uneven appearance
- Skipping the voltage test risks serious electrical shock
- Forcing stuck screws can strip threads or crack metal
- Forgetting to photograph before disassembly leads to confusion
- Using incorrect pin lengths causes crystals to hang crooked
- Cleaning crystals with abrasive materials scratches surfaces
Refer to the complete crystal chandelier cleaning guide for additional maintenance techniques to apply during this restoration process.
Verifying restoration quality and maintaining your chandelier
Once reassembly completes, inspect everything before restoring power. Check that all crystals hang securely without wobbling. Verify pins sit flush and straight, not bent or loose. Look for any gaps in the crystal arrangement where pieces might be missing or incorrectly positioned. Gently shake the fixture to ensure nothing rattles or falls.
Examine electrical connections if you replaced sockets or wiring. Ensure wire nuts are tight, no bare copper shows, and connections match your photos. Verify the ground wire attaches properly to the fixture’s metal frame. Double-check that bulb wattages don’t exceed fixture ratings to prevent overheating.
Conduct a visual comparison against your before photos. Crystals should create uniform patterns across each tier. Finishes on pins and hardware should match throughout. The overall appearance should look balanced and intentional, not haphazard. If something looks off, now is the time to adjust before powering on.
Establish a maintenance schedule to preserve your restoration work. Regular maintenance is key to keeping your refurbished chandelier looking its best and functioning safely. Cleaning frequency depends on location and dust exposure, with kitchens needing more frequent attention than formal dining rooms.
Follow these maintenance intervals:
- Weekly: Dust lightly with a microfiber duster to prevent buildup
- Monthly: Spot clean any visible smudges or fingerprints
- Quarterly: Inspect for loose crystals or pins needing adjustment
- Annually: Perform thorough cleaning and check all electrical connections
- As needed: Replace bulbs promptly to maintain even lighting
Pro Tip: Keep soft microfiber cloths specifically for chandelier maintenance and avoid paper towels that can scratch crystal surfaces or leave lint behind.
Maintaining electrical safety prevents fire hazards and extends fixture life. Never ignore flickering bulbs, burning smells, or loose connections. Address issues immediately to protect your home and investment.
Consult crystal chandelier maintenance tips for 2026 for advanced strategies to retain maximum sparkle year after year. Proper care transforms your restored chandelier from a one-time project into a lasting statement piece.
Explore high-quality replacement parts at CrystalPlace
Your restoration deserves materials that match the quality of your effort. CrystalPlace specializes in authentic Swarovski crystals and premium chandelier components that bring fixtures back to life. Since 1991, they’ve provided homeowners and professionals with crystal prisms in every size, shape, and finish imaginable.

Browse their extensive selection to find exact matches for vintage fixtures or modern upgrades for contemporary designs. Their inventory includes pendalogues, octagons, teardrops, and specialty shapes with precise measurements listed. Brass pins, bobeches, and decorative elements come in finishes from polished chrome to antique brass.
Top categories for chandelier restoration:
- Replacement crystal prisms in all standard sizes
- Brass and stainless pins with various finishes
- Decorative crystal ornaments and suncatchers
- Specialty cleaning solutions formulated for crystal
- Custom chandelier design services
Free shipping on orders over $22 makes stocking up on replacement parts economical. Their expertise helps you identify exactly what you need, eliminating guesswork and costly mistakes.
Frequently asked questions about replacing chandelier parts
How do I know which crystals to buy for my chandelier?
Measure an existing crystal’s length, width, and hole diameter precisely using calipers or a ruler. Photograph the crystal from multiple angles and note its shape like teardrop, octagon, or pendalogue. Compare your measurements and photos against supplier catalogs to find exact matches, ensuring visual harmony across your fixture.
Is it safe to rewire a chandelier myself during replacement?
Rewiring requires electrical knowledge and adherence to local codes. If you’re comfortable working with household wiring and understand proper grounding, you can handle basic socket replacements. Complex rewiring or fixtures with multiple circuits should involve a licensed electrician to ensure safety and code compliance.
How often should I clean my chandelier after replacing parts?
Clean your chandelier every three to six months in low-traffic areas like formal dining rooms. Kitchens and entryways need monthly cleaning due to grease and dust exposure. Light dusting weekly prevents buildup that requires intensive cleaning later.
What should I do if I can’t find exact matching parts?
Contact specialty suppliers like CrystalPlace who maintain extensive inventories of vintage and modern components. Provide detailed measurements and photos to help them identify suitable matches. Consider replacing an entire tier with new matching crystals if originals are truly unavailable, maintaining visual consistency.
Can replacing crystals improve the chandelier’s sparkle and light effect?
Absolutely. New crystals refract light more effectively than old, clouded pieces. Authentic crystal prisms create rainbow effects and brilliant sparkle that acrylic or damaged crystals cannot match. Upgrading to higher-quality crystals dramatically enhances your chandelier’s visual impact and light distribution.
Recommended
- Chandelier Parts Checklist That Prevents Mistakes – CrystalPlace
- Replace Chandelier Crystals Without Guesswork – CrystalPlace
- Chandelier Column Parts: Replace and Restore – CrystalPlace
- Crystal Chandelier Repair 2026: 95% Satisfaction Guide – CrystalPlace