

Learn safe techniques for suspended ceiling crystal fixture mounting. Ensure secure installation and avoid hazards with expert tips and guidelines.
Suspended ceiling crystal fixture mounting requires one non-negotiable rule: never trust the grid alone. Standard drop ceiling grids are engineered to hold lightweight acoustic tiles, not decorative crystal chandeliers. The moment you hang a heavy fixture from the T-bar system without independent structural support, you are creating a hazard. The fix is straightforward: anchor directly to the joists or rafters above the plenum space, use the correct gauge wire for your fixture’s weight, and choose a mounting kit designed for drop ceiling applications.
Here is what the weight thresholds look like under ASTM E580:
- Under 10 lbs: One #12-gauge safety wire connected from the fixture to the structure above.
- Between light and moderately heavy weights: Two #12-gauge wires attached at diagonal corners to the structure above.
- Heavy fixtures: Four taut #12-gauge wires, one at each corner, independently supported from the structure. The support system must be capable of holding multiple times the fixture’s weight.
- Pendant-mounted fixtures: Must be supported directly from the structure using 9-gauge wires; the ceiling suspension system cannot bear their load.
Every fixture also needs positive mechanical attachment to the ceiling suspension system to resist horizontal forces. Two screws or approved fasteners are the minimum per ASTM E580 Section 5.3.1. Ceiling tiles and gypsum board panels carry none of this load.

What mounting kits and adapters work for crystal fixtures on suspended ceilings?
The right hardware makes the difference between a fixture that stays up safely for decades and one that sags after a year. Three product lines are widely used by professional installers for suspended ceiling lighting applications.
- Chief Suspended Ceiling Kits include adjustable hanger wires and ceiling plate adapters that transfer fixture weight directly to the structural ceiling above the grid. They are compatible with a broad range of fixture weights and ceiling heights.
- Peerless-AV Suspended Ceiling Plates offer a flat mounting plate that bolts to structural elements above the drop ceiling, providing a stable base for pendant and chandelier-style fixtures.
- Crimson Suspended Ceiling Adapters are designed for flexibility, with adjustable arms that span across grid members and lock into position, distributing load across multiple structural attachment points.
Beyond these three, adjustable fittings from specialty hardware suppliers give installers the ability to fine-tune drop length and angle after the fixture is hung, which is particularly useful for crystal chandeliers where level alignment affects how light refracts through the crystals.
| Kit / Adapter | Best for | Key feature |
|---|---|---|
| Chief Suspended Ceiling Kits | Medium to heavy fixtures | Adjustable hanger wires, ceiling plate |
| Peerless-AV Suspended Ceiling Plates | Pendant and chandelier styles | Structural bolt-through plate |
| Crimson Suspended Ceiling Adapters | Flexible grid configurations | Adjustable arms across grid members |
Tools and materials you will need:
- Stud finder or joist detector
- Drill with wood and metal bits
- #12-gauge galvanized hanger wire (or #9-gauge for pendant mounts)
- Wire cutters and pliers
- Voltage tester and wire nuts
- Mounting kit appropriate to fixture weight
- Decorative ceiling medallion or ceiling round
- Utility knife for tile cutting
How to install crystal lights on a suspended ceiling, step by step
Getting the installation right the first time saves you from pulling tiles twice. Work methodically and keep the power off throughout.
-
Locate the joists or rafters above the grid. Use a stud finder from above if you have attic access, or tap along the structural ceiling to find solid wood. Mark the joist location on the adjacent tile before removing anything.
-
Remove the ceiling tile at the fixture location. Lift the tile straight up and set it aside without bending it. If you need access to adjacent tiles for wiring runs, remove those too. Removing adjacent panels gives you room to work above the grid without damaging visible tiles.
-
Cut the fixture hole in the tile. Drop a plumb bob from the joist to find the exact center point below. Transfer that measurement to the tile and cut a 1-inch round hole with a utility knife. Keep the cut clean so the ceiling medallion seats flush.
-
Install the mounting kit. Attach your chosen kit (Chief, Peerless-AV, or Crimson) to the structural ceiling above. Run the required number of #12-gauge hanger wires from the fixture housing up to the structure, following the weight-based requirements from ASTM E580. Tighten all connections and verify the wires are taut for fixtures over 56 lbs.
-
Wire the electrical connection. Turn off the circuit at the breaker and confirm with a voltage tester. Feed the fixture’s power cord through the ceiling tile hole and into the junction box mounted to the joist. Match black to black and white to white, secure with wire nuts, and attach the ground wire to the box’s ground screw. Screw the junction box cover on firmly.
-
Hang the fixture and check security. Feed the chandelier chain through the tile hole, hook it to the structural mount above, and gently test the connection by applying downward pressure before releasing the full weight. The fixture should not shift or rotate.
-
Restore the ceiling tiles. Slide the modified tile back into the grid. Feed the fixture cord through the decorative ceiling round and glue the round to the underside of the tile to cover the cut edge.
Pro Tip: Use a decorative ceiling medallion sized at least 2 inches wider than your fixture’s canopy. It conceals the tile cut, protects the edge from cracking over time, and gives the installation a finished, intentional look rather than a patched-together one.
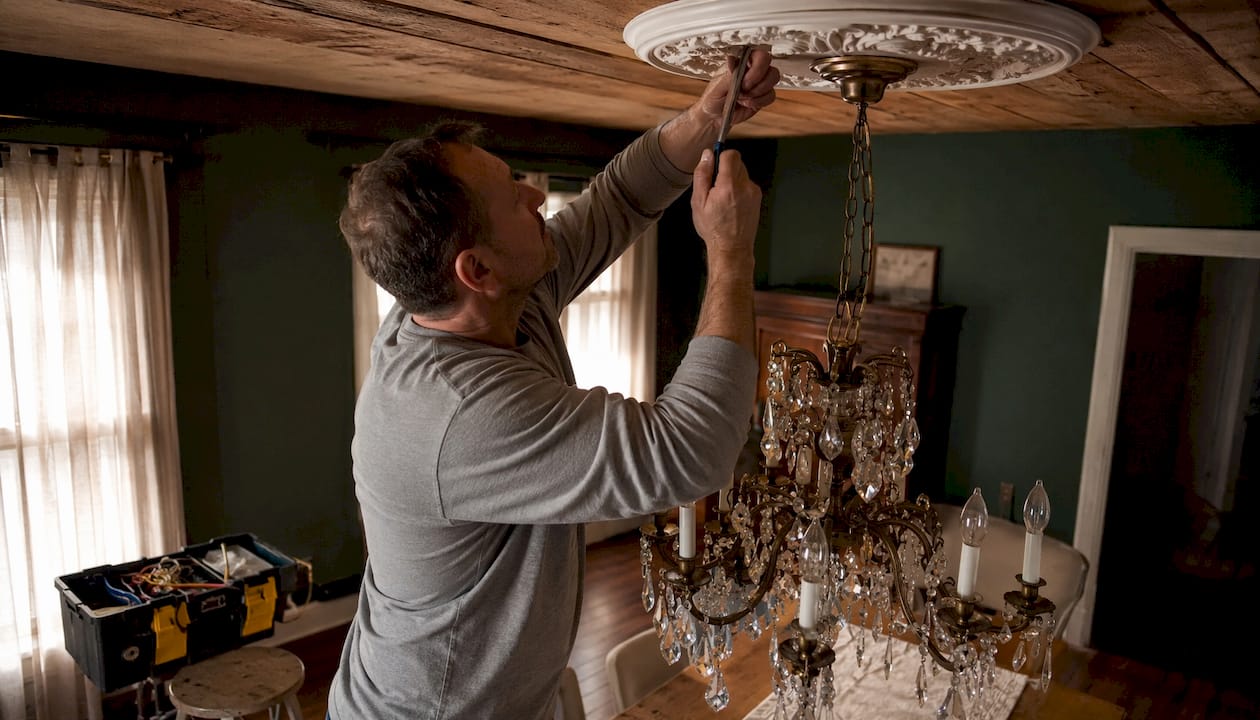
Safety requirements every installer must follow for heavy crystal fixtures
Heavy crystal chandeliers introduce risks that lighter fixtures simply do not. The weight is concentrated, the crystals add fragility, and any movement in the fixture amplifies stress on the mounting point.
Standard suspended ceiling grids are not rated to support heavy light fixtures. Transferring that load to the tiles instead of the structure causes long-term sagging and, eventually, fixture failure. Molly anchors and drywall anchors are equally inadequate for ceiling-mounted crystal fixtures; they work for light wall applications but cannot handle the dynamic loads a hanging chandelier creates.
Weight support requirements under ASTM E580: Fixtures over 56 lbs must be independently supported from the building structure by at least four taut #12-gauge wires, each capable of supporting four times the fixture’s weight. No portion of that load may transfer to ceiling panels.
Safety best practices checklist:
- Verify local building codes before starting. Some jurisdictions require documented installation plans and professional sign-off for heavy fixture installations.
- Always anchor to joists or rafters, never to the grid or tiles alone.
- Use #12-gauge galvanized wire minimum; upgrade to #9-gauge for pendant-mounted fixtures per ASTM E580 Section 5.3.7.
- Attach fixtures with at least two mechanical fasteners to resist horizontal forces equal to the fixture’s weight.
- Confirm the junction box is rated for the fixture’s weight before wiring.
- Never use rotational spring catches as clamping devices; steel clamps of at least #14-gauge are required.
DIY crossbar fixes that spread load across tiles rather than joists cause uneven ceiling appearance and structural hazards over time. If you are not confident locating joists above a finished plenum, bring in a licensed electrician or structural installer before proceeding.
Expert guidance from Crystalplace on mounting and maintaining crystal fixtures
Crystal fixtures carry considerations that standard lighting does not. The weight of genuine Swarovski crystal components adds up quickly, and the individual prisms, strands, and connectors are fragile enough that vibration during installation can cause chips or breakage. Crystalplace has specialized in authentic crystal products since 1992, and the guidance below reflects what experienced installers consistently get right.
Before mounting:
- Weigh the complete assembled fixture, including all crystal strands and hardware, before selecting your mounting kit. Manufacturers often list shipping weight, not assembled weight.
- Check that your crystal chandelier connectors and metal clips are fully seated before the fixture goes up. Re-seating a crystal strand at ceiling height is far harder than doing it on a workbench.
- For fixtures over 30 lbs, consider a two-person installation: one person manages the chain and electrical connections above the tile, the other steadies the fixture below.
Post-installation maintenance:
Crystal fixtures collect dust and airborne grease faster than most homeowners expect, especially in kitchens or open-plan spaces. A regular cleaning schedule preserves the refraction quality that makes crystal worth the investment.
- Clean crystal prisms every 3–6 months using a lint-free cloth and a crystal-safe cleaning solution. Crystalplace offers cleaning products formulated specifically for Swarovski and authentic crystal components.
- Never spray cleaner directly onto the fixture. Moisture can work into metal connectors and cause corrosion that weakens the mounting hardware over time.
- Inspect hanger wires and mounting hardware annually. Look for any wire that has kinked, frayed, or lost tension, and replace it before it becomes a problem.
Pro Tip: Before your first cleaning, photograph the fixture from multiple angles. Crystal strands can shift during cleaning, and a reference photo makes it easy to restore the original arrangement without guessing.
Crystalplace’s step-by-step installation guides cover the full process from selecting compatible hardware to final crystal placement, with specific advice on suspended ceiling applications. The product catalog includes everything from individual Swarovski prisms to complete chandelier kits, with free shipping on orders over $22 within the USA.
Key Takeaways
Safely mounting crystal fixtures on suspended ceilings requires independent structural anchoring, correct-gauge hanger wires matched to fixture weight, and a mounting kit designed for drop ceiling applications.
| Point | Details |
|---|---|
| Grid cannot bear fixture weight | Standard suspended ceiling grids support tiles only; all fixture weight must transfer to joists or rafters above. |
| Wire gauge and count by weight | Under 10 lbs: one #12-gauge wire; 10–56 lbs: two diagonal wires; over 56 lbs: four taut #12-gauge wires to structure. |
| Use a dedicated mounting kit | Chief Suspended Ceiling Kits, Peerless-AV Suspended Ceiling Plates, and Crimson Suspended Ceiling Adapters each provide independent structural support. |
| Check local codes first | Some jurisdictions require documented plans and professional verification for heavy fixture installations on suspended ceilings. |
| Maintain crystal fixtures regularly | Inspect hanger wires annually and clean crystal prisms every 3–6 months to preserve brilliance and hardware integrity. |
Ready to find the right crystal fixture for your space?

Crystalplace carries an extensive selection of authentic Swarovski crystal prisms, chandelier components, and complete fixture kits, all backed by over 30 years of crystal expertise. Whether you are replacing individual strands or starting a full installation, you will find the crystal prisms and hardware you need, with free shipping on orders over $22 within the USA.
Recommended
- Top 5 Best Hanging Crystals for Lighting Alternatives 2026 – CrystalPlace
- Crystal Prisms vs Acrylic for Chandeliers – CrystalPlace
- Crystal Fixtures: Elevate Lighting and Elegance in Any Space – CrystalPlace
- Hanging Crystals That Transform Light – CrystalPlace